Here is yet another release for Dutch Paper Crafts, I found this awesome book with a spring wreath and i thought why not use this concept for Christmas?
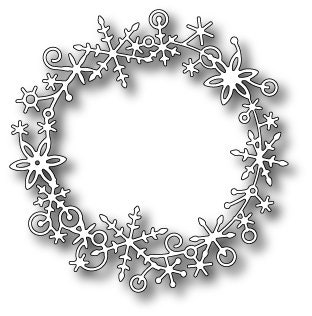
Here is my project using the featured release Memory Box Frostyville Wreath #98418: inside of wreath (red)

Other items used for this project:
Any square measuring about 1.5" for the green"curled" paper. I would recommend using the Spellbinders Fleur Dis Le square S4-318.
Memory Box Locina Buckle 98184 (cream glitter paper- cut in half)
I also used the standard Spellbinders Classic Circles to cut the base (largest circle), and then i made another gold band using the circles (found under the Frostyville wreath)


Digital image used is from Mo's Digital Pencil and is called, Santa's Hat.
Copics used:
skin- YR000, 00, R14, 20
hair- E25
eyes- BG13
hat- R35, 37, 39, YR20, CB stickles
outfit- G20, 21, 24
cookie- YR21, C1, CB
plate- YR23, 24
Some pictures constructing this project:
I used a cereal box for my "chipboard" base..i cut out two and glued them together. I cut out two paper circles one for the front and back to cover the chipboard. Then i started to curl the 1.5" squares and secured them with hot glue. After i made enough of the rolled green squares, i again hot glued them around the base. Next i used jewelry head pins and threaded the three different sized pearl beads on..to secure them from not falling off, i hot glued the first and last bead to the pin. Nest i just glued the pearl head pins inside each of the curled squares. I cut out the dies and added them. This shows that anything can go in the center. You don't have to use a digital image.


Here is my project using the featured release Memory Box Frostyville Wreath #98418: inside of wreath (red)

Other items used for this project:
Any square measuring about 1.5" for the green"curled" paper. I would recommend using the Spellbinders Fleur Dis Le square S4-318.
Memory Box Locina Buckle 98184 (cream glitter paper- cut in half)
I also used the standard Spellbinders Classic Circles to cut the base (largest circle), and then i made another gold band using the circles (found under the Frostyville wreath)


Digital image used is from Mo's Digital Pencil and is called, Santa's Hat.
Copics used:
skin- YR000, 00, R14, 20
hair- E25
eyes- BG13
hat- R35, 37, 39, YR20, CB stickles
outfit- G20, 21, 24
cookie- YR21, C1, CB
plate- YR23, 24
Some pictures constructing this project:
I used a cereal box for my "chipboard" base..i cut out two and glued them together. I cut out two paper circles one for the front and back to cover the chipboard. Then i started to curl the 1.5" squares and secured them with hot glue. After i made enough of the rolled green squares, i again hot glued them around the base. Next i used jewelry head pins and threaded the three different sized pearl beads on..to secure them from not falling off, i hot glued the first and last bead to the pin. Nest i just glued the pearl head pins inside each of the curled squares. I cut out the dies and added them. This shows that anything can go in the center. You don't have to use a digital image.


This is a wonderful ornament. The details you've put into it are just scrumptious. I so like the stick pins inside the cones. Beautifully done!
ReplyDeleteFantabulous, Bonnie! So nice of you to include directions! Love the design, the papers, the fab die cuts, and that darling, beautifully-colored image! :^)
ReplyDeleteHugs, Penny
What a creative wreath. Beautiful!
ReplyDeleteSuch a fabulous design! Love the stick pin accents!
ReplyDeleteThis is beautiful! I may try to make one of these. Your instructions make it sound easy. I love your work!
ReplyDelete