Monday, September 29, 2014

My Besties International 2 wk challenge- Tag It! (Gift Card holder)

Welcome to the start of a new 2 week challenge at My Besties International Challenge blog!

Your challenge for the next 2 weeks at the My Besties Challenge Blog is to "Use a tag". 

I can't wait to see what you create, so that i can view it on the blog!

To join this My Besties International challenge please click here! *Remember you must use a My Besties image when you create your project. :) 


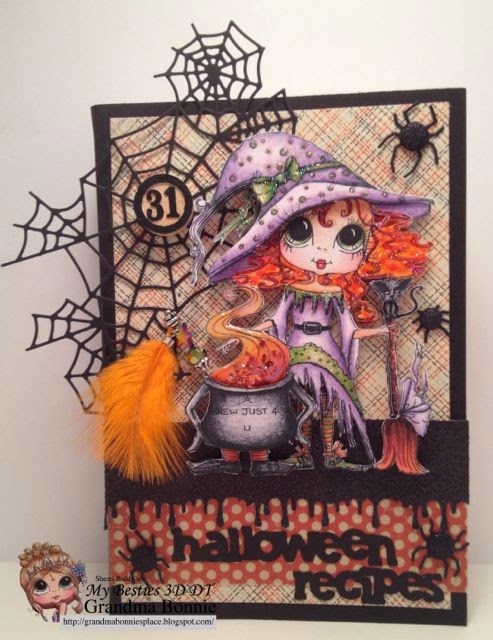
Here is my card using the My Besties image called "Nellie Pirate Costume"

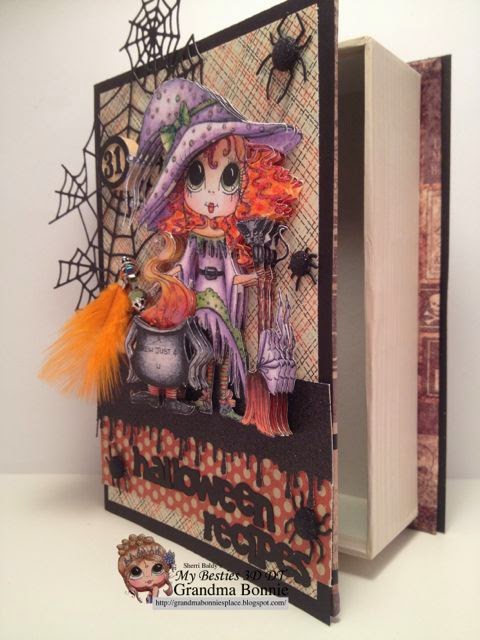
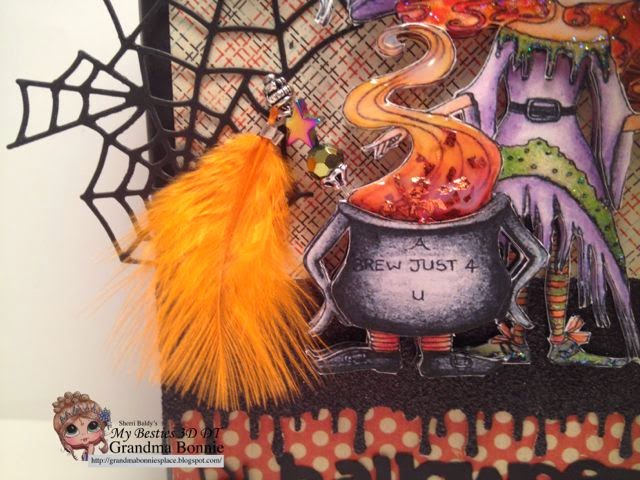
More details inside of the card:

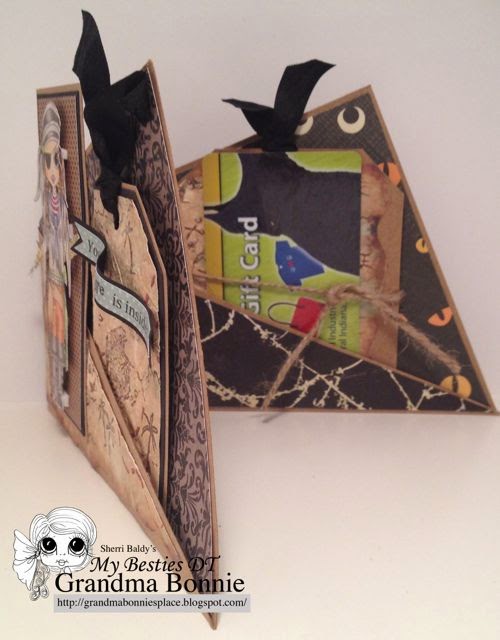
I have used a fancy fold called "Angle Fold" from the DVD called Teresa's Fantastic Folded cards and Boxes available at Paper Wishes. Or from a Youtube video here.


Please visit my team mates blogs and see what lovely things they have created too!


Bonnie (that's me)


Challenges:

Thursday, September 25, 2014

My Besties 3D Witch's brew Tips and Tricks tutorial featured in my Witch Cookbook container cover

Hi, all..super excited about the new Sherri Baldy's My Besties 3D Witch i did this week.  I thought i 'd give you a few tips and tricks for creating the 3D Witch!


Here are the 3D layers and how i cut out the hair. I can't stand the white and it is too hard to cut out the cork screw hair. So i have a plan.  I also changed the last lay, so that i could add my "fancy pin" to the pot. And i wanted the cat and bottom of the broom to be 3D separately from the handle. I also didn't cut out the cat's tail 4 times..i can't make that 3D anyway.


To make the hair "easier" to cut out, I chose to color in the hair. I used copics. The copics i used is YR61, 65, 24, 68, R08. I blended the whole thing with the YR61. I also added Stickles on the finished project.  Can you see how it would be easier to cut it out this way?


These, 3D images are cute just cut out all by themselves and this would have made an nice magnet or something to hang up. They are definitely sturdy enough to stand on their own.


Side view of 3D.

Check out my finished project in the post before this one.. should be just below. :)

Sherri Baldy's My Besties 3D Cookbook container/holder part one

This week at My Besties 3-D Deco Challenge blog we have another great two week challenge for you!

The theme is to add a Stick Pin to your project/card

To participate in our My Besties 3D challenges go here

For this project i am using a My Besties 3D sheet found at Sherri Baldy's My Besties store here.   This will be a two part project.  For this challenge i made the cookbook container/holder.  In two weeks i will share the cookbook that goes inside.
This is a cardboard book container that i purchased at Michaels and altered the outside of it.  

Side view showing the 3D layers:


These sheets are fun and easy to use!  They are all pre-colored for you, all you do is print out your sheets, cut out the pieces you wish to use and layer them with foam tape, foam dots/squares or Silicone glue. 

Dies i used:
Spiderwebs and spiders from Memory Box
goo dripping is a Martha Stewart border punch
title is from a cricut cart

You should also check out my 3-D Deco team mates awesome designs..the links are below:

Julie Team Leader
Andy
Andrea
Angela
Annette
Deirdre
Luana
Miranda
Tonnie
Bonnie (me)

Challenges:

Digital Delights featuring Wendy Love, Happy Birthday

This Digital Delights image is from the Dreamyland collection.  She is called, Wendy Love. 

Here is the card i made for the Digital Delights Blog:


Dies used on this card are:
All of the clouds are from Memory Box.
Happy Birthday is from Marianne Designs

Copics used:
skin- YR000, 00, E02
hair- E97, 99, 19, 09
dress- BG10, 11, 13
stockings- YR000, C0, 1
Stickles


Please, please check out the other cards/projects my team mates made at the Digital Delights blog or you can check out the Digital Delights challenge blog and win some great prizes!

Challenges: 
 

Friday, September 19, 2014

My Besties 3D decoupage Santas Little Helper

Sherri Baldy released several new Christmas images and 3D sheets this month. I love them all and one of the 3D Decoupage sheets with Santa and a Little Besties is one of my favorites.  I've already colored up a Santa Little Besties black and white image and this time i am making a 3D decoupage image. 

What's fun about this Decoupage sheet?  It is already colored and ready to cut out and layer.  The Decoupage gives stability and depth to any project.  I was excited to see this 3D as an ornament.

I recently purchase a "bottle cap" that measures about 4" in diameter.  I felt this would make a great stable back for the 3D image. I had my husband drill a hole in the top and bottom.  I added a bead and made a loop on both ends.  The top loop was for a ribbon hanger and the bottom was for a dangling gem.

I also used Glossy accent on the snowflake punches and the evergreen so that they would be more sturdy for the tree or hanging anywhere.

Here is the link for the Sherri Baldy's My Besties 3D image Santa with Little Bestie.

Here are some more views to see the dimension:


Challenges:

My Besties 3D decoupage Tips and Tricks

Hi, i have made a few tutorials making the 3D My Besties decoupage sheets by Sherri Baldy.  I thought i'd make a post of some of my tips and tricks:


I am using the My Besties Mermaid in a shell 3D Decoupage sheet.
The current 3D My Besties sheets are here in the Sherri Baldy's Etsy store.

Here are the layers cut out. Every place you see dark green (my mat) is what i cut out. How would you cut under the chin and by the wing? Some would use an artist knife (xacto), but i am not that talented. I cut through or around. Let's look closer at my next photo.


To cut away under the arm..i cut under the elbow. I then continued to cut around the top of the seashell under her waist to get to the white part by her wings. To cut under the left cheek, i cut around her hand. I find it easier to cut out the fin strips by cutting around the outside of the fin and coming back in and making slits on each side of the sections..being careful not to cut too close to where they join at the base.


In some cases, i want the image to be 3D and then a section to be 2d. What do i mean? Take a look at the elbows. I put the foam dots on the head and used my glue pen on the elbows to keep the arms from popping up. One reason is because i cut the right one loose from the seashell when cutting out the white. The other elbow was the last layer and it would be free to pop up slightly and i wanted it to rest on top of the sea shell more..so i also used the glue pen to keep it down. Next i wanted to give the seashell some dimension so i cut some layers on my own and popped up sections and then used a glue dot to adhere the end..that section is under the wing.


Here is a close up to see the elbows and the seashell section. Also, notice the fish lips.. they are on the 4th layer, but the fish body is on the 3rd layer..so that it doesn't look like the fish lips are separate from his body..i used my glue pen again..and pressed the left side of her head down. If you look close you can see that that no one can perfectly cut the white off. What some people do is use a black liner/marker and color in the edges of all of their cut out images so that those white edges don't show. I think i am ok with it as is.


Here is the image on the card finished:

side view of card:


If you are interested in making a 3D My Besties decoupage card and would like to enter a challenge, there is one here called:  My Besties 3D Deco challenge.  

Challenges:


Your Next Stamp featuring Gretchen Sitting

Happy Friday!
It’s time for another Your Next Stamp Fun Friday challenge!

This will be my last project for Your Next Stamp. As you all know from the announcement at the beginning of the month, Your Next Stamp will no longer be carrying Digital images.  They WILL be carrying the same artists from Omnia Designs but in Clear stamp form.  Working with Karen, the owner of Your Next Stamp is wonderful and i loved my year working with her.


Here’s my project using Gretchen sitting from the YNS store:


Here is the the monthly challenge sketch or photo.


You can either play along with the sketch, the inspiration photo or both!


Pop on over to the YNS Challenge blog to see what my Design Team members have made. I would love to see you playing along!

I hope you have a wonderful weekend!

Challenges:

Thursday, September 18, 2014

Digital Delights featuring Jonnie Love.. Tick Tock Happy Birthday

This Digital Delights is from the Dreamyland collection.  He is called, Jonnie Love. He has a "Peter Pan" character look.  The Sentiment is from the Dreamyland collection.

I decided to go with the Peter Pan theme..and was inspired by Big Ben in London.   Remember when they all flew to Big Ben in the Disney movie? 

Here is the card i made for the Digital Delights Blog:


Dies used on this card are:
Clock and corner flourish on top are from Marianne Designs.

Copics used:
skin- YR000, 00, E02
hair- E53, 55, 57
hat band/stripes- BG10, 11, 13
glasses- Zig pen black 05/G10
hat/shoes- C3, 5, 7


Please, please check out the other cards/projects my team mates made at the Digital Delights blog or you can check out the Digital Delights challenge blog and win some great prizes!

Challenges: 
 

Monday, September 15, 2014

Sherri Baldy's My Besties International 2wk challenge #19 My Besties with a Pet

Welcome to the start of a new 2 week challenge at My Besties International Challenge blog!

Your challenge for the next 2 weeks at the My Besties Challenge Blog is to "Use a My Besties and pet".  I can't wait to see what you create, so that i can view it on the blog!

To join this My Besties challenge please click here! *Remember you must use any My Besties when you create your project. :) 

I think the colors of this card is perfect for fall and all of the colors from the leaves..plus i just love the colorfulness of this image! 


More details:
I am using the wonderful My Besties Digi called, Messy Tessy Paints her dog.

Dies used:
Clouds- Memory Box
Banner- La La land
View master- Little Darlings
Lacy heart- Cheery Lynn
foliage- Noor/Joy Crafts
heart punches- Stampin Up

Copics used:
skin- YR000, 00 12, E02
hair- E41, 42, 43, 44, 439
shoes- E43, 44, 49
brush- E49, 43
pink- RV21, 23, 25, 29
blue- B91, 93, 95
orange- YR00, 04, 07
green- YG01, 03, 17
dog- E50, 51, 53, 55, 57, 02
palate- C1

Please visit my team mates blogs and see what lovely things they have created too!
 
Deb  
Bonnie (that's me)

Challenges:

Friday, September 12, 2014

Sami Stamps honors Breast Cancer Awareness with Beautiful Ribbons release!

Every 1st, 3rd and 5th week of the month,  i look forward to the new release that  Sami Stamps  creates.  However this time..due to the Labor Day holiday we are having a special release called Beautiful Ribbons for Breast Cancer Awareness for the month of October.

We don't have a challenge going on but we DO have a DT call...please check it out and enter..we'd love to have some new team mates!  Click here for the info.

I love this image called, My Beautiful Life:


Dies used:
Butterflies and foliage are from Noor/Joy Craft
Card base is from Sue Wilson called Tuscany

Copics used:
skin- YR20, 21, 24, E02
hair- C3, 5, 7 white gel pen
top- W1, 3, CB,  RV06
jeans- B91, 93, 95

Here is the fun new release:

Want to see some more inspiration using these images?  You can check out my team mates blogs featuring them as well.

Challenges:

Thursday, September 11, 2014

Digital Delights featuring Hookie from Dreamyland

This  Digital Delights image is from the Dreamyland collection.  His name is "Hookie" and could take you to Neverland by the looks of it!

I found a free printable pirate map online and printed it off and then cut it out.  After i did that i sprinkled some water on it by flicking water with my fingers.  Then i wadded it all up into a semi-tight ball. I carefully unwrapped it and laid it out.  Then ironed it to remove the wetness.  I adhered it to the front and back of my card.

Here is the card i made for the Digital Delights Blog:

Here is the view so you can see the back as well:


Copics used:
skin- YR000, 00, E02
hair/shoes- C3, 5, 7
hat- RV63, 66, 69
feather- Y20, 21, YR24, CB
coat- R35, 37, 39, Y28
sword/hook- C1, 3
Gelly Roll/clear star


Please, please check out the other cards/projects my team mates made at the Digital Delights blog or you can check out the Digital Delights challenge blog and win some great prizes!

Challenges: 
 

Sunday, September 7, 2014

September Your Next Stamp Digital Stamps Release and Announcement!

Hello and welcome to our September Your Next Stamp Digi Blog Hop. The Digi Team have worked hard to complete some awesome projects for this hop! We have EIGHT new digi stamps in the store and an announcement to make today.  

After much consideration, we have decided that Your Next Stamp will go back to it's rubber roots and we will be discontinuing the Digital Stamp line from the store in October 2014. We all know how much you have come to love the cute characters from the Omnia line and we are happy to still offer the whimsical images as clear stamps
You will still be able to purchase all Digital Stamps until October 2014 and with the sale offered below, you will want to stock up now!

The new release hop begins on Anita's blog and if you've been hopping along, you should have come from Deborah's blog. Make sure you hop around to all of the blogs featured in the link list located at the bottom of this post for lots of inspiration using the new products! If you leave a comment on all of the blogs, you will be entered to win a a digi stamp of your choice - there will be four winners and four prizes given away in total. The lucky winners will be announced on the Your Next Stamp Blog September 10th.

For my project I used the adorable Little Alli


Now is the time to stock up on all the digi stamps - Buy three and get one free with the code below!


Thank you so much for stopping by today and hopping along with us! 
Now it's time to head on over to Shelia's blog, but before you go, don't forget to leave a comment.

Friday, September 5, 2014

How to make Stick Pins for your cards (beginners guide)

There is a challenge coming up i will be doing with stick pins..and i thought i need to see if i can make some of these.  So first stop... Youtube.  I checked out several videos and I think i came up with some good ideas all rolled into one tutorial for beginners. 

First off... Supplies:

Styrofoam..preferably one that will be able to set and not tip over (i used what i had and I  had a Styrofoam ball..now i've cut it in half...although my foam tape roll worked as a great base so it didn't roll away) This is used to hold your pin as it dries. (others recommended plastic earring backs, but i would have to buy those, so i went with Styrofoam)

Ranger's Glossy/Matte Accents (or something just like it) (some use E6000, but i opted out because of the smell and i think it takes a bit longer to dry)

Random small beads..not seed beads, but not beads with big holes..beads that have holes just a bit bigger than a straight pin.  Iridescent always work well because they match with most other metal beads etc.  (Your choices will change as you start making more stick pins)

Metal bead charms..or not..i like the character.

Other options: miniature charms, jewerly, feathers (will need clips for these), miniature letter block beads.

Basic jewelry supplies, small jump rings, bead caps to fit the beads you are using, hat pins, bead pins..or wire.  In this tutorial i am using decorative bead pins and one head pin. Needle nose pliers, or whatever you use for jump rings, rounded nose pliers, close snip wire cutters.

So let's get started:
I usually "test" all of my beading by layering it on the pin, once i find i like it, i put it back on and put a dot of Glossy accents on the last bead before the bead cap.  Once i put the bead cap on i poke it into the Styrofoam to dry.  That's pretty much it.

Here is the process in photos for you:
"character beads"

laying out my bead selection


This one is blurred, but i think you can see what i did.

Supplies for a simple Feather stick pin
Securing the feather to a jewelry finding


Purple feather version (i made two)


Adding jump ring to jewelry finding


Boo Stick pin supplies
I am adding a dangling word


using miniature jewelry


Finished Boo stick pin


using a charm
Thanks for looking, hope it inspired you to make a stick pin for your cards.  I will be using these soon!


Your Next Stamp Fun Friday Challenge a little sneak peek

Happy Friday!
It’s time for another Your Next Stamp Fun Friday challenge!


Here’s my project using A Warm Welcome digi from the YNS store (this image won't be available until Sunday, Sept. 7 at the New Release blog hop!)


Here is the the monthly challenge sketch or photo.


You can either play along with the sketch, the inspiration photo or both!


Copics used:
doghouse-W1, 3, 5, 7
dog- E31, 33, 34, 37, 39
cat- C1, 3, 5
bone- YR20, 21, Y32
blue bowl- B23, 24, 26
red bowl- RV25, 29


Pop on over to the YNS Challenge blog to see what my Design Team members have made. I would love to see you playing along!

I hope you have a wonderful weekend!

Challenges:

Thursday, September 4, 2014

Digital Delights presents Halloween featuring Helga Frightner

Do you ever wonder how i get the new release image from Digital Delights?  Well, i don't get to pick which one i'd like to share, we are assigned the image.  It is always interesting which image i receive.

This image at Digital Delights is from the new release.  She is called Helga Frightner..i think the name says it all.   I decided to make a milk carton candy box that could be filled with some special treats.

Here is the card i made for the Digital Delights Blog:

side view:


Dies used on this card are:
The carton is from a Cricut cartridge called Tags, Bags, boxes 2.  The scallop oval and oval are from Lifestyle crafts

Copics used:
skin- YG61, 63, E81
tooth- YR21
hair- C1, 3, 5, YR21
hat/shoes- W1, 3, 5
dress/hat band- YR12, 65, 68
hat ribbon, shoes- V06, 09
cat- C1, 3, 5, V06, 09
broom- E37, YR24, 21
globe- C1, 5, Gelly Roll/clear star


Please, please check out the other cards/projects my team mates made at the Digital Delights blog or you can check out the Digital Delights challenge blog and win some great prizes!

Challenges: 
 

Monday, September 1, 2014

One of my favorite challenges! My Besties and Doily, Lace or Ribbon

Welcome to the start of a new 2 week challenge at My Besties Challenge blog!

Your challenge for the next 2 weeks at the My Besties International Challenge Blog is to "Use a doily, lace or ribbon". 
 
I can't wait to see what you create, so that i can view it on the blog!

To join this My Besties International challenge please click here! *Remember you must use a My Besties image when you create your project. :) 


Here is my card using the image "Fancy Pants Afternoon Stroll"

More details:

Dies used:
Oh the deliciousness of dies.. :)  I have used Lifestyle crafts/purple doily and oval, green doily and white eyelet die is Marianne Designs.  The butterflies are a Martha Stewart punch.

Copics used:
skin-YR000, 00, E02
hat/pants- E41, 42, 43
hair- E25, 29
flowers- B60, 63, 66
flower centers- YR21, 24
leaves- YG01, 03, 17
shoes/trim- Y20, 21, 24, 28
shirt- R81, 83, 85, 89


Please visit my team mates blogs and see what lovely things they have created too!


Bonnie (that's me)


Challenges: