Pages

Saturday, February 12, 2022

Fairy Hugs Sentiment Release - Sneak Peek - Fairy Whispers - Believe

 Hello everyone and Happy Saturday!! 

I have another post for you today featuring another Fairy Hugs Sentiment 
from the upcoming release on Feb. 15. 

Let's see what we can make using Fairy Hugs Store supplies! 

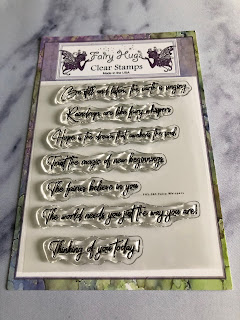
I am using Fairy Hugs Sentiment - Fairy Whispers (Believe).. 1 of 7 on line sentiments in this set.

For this card, i did some mixed media and a lot of inking.  
I started with a We Are 3 Digital Paper - Backgrounds Happen.  The only part of the digital paper you see is the flower.  I will explain.  I stamped the Fairy Flower onto the digital paper (it was pink and distressed) with clear embossing ink and powder.
Next, i used Distress Oxide - Mermaid Lagoon and Dusty Concord and inked the entire card.
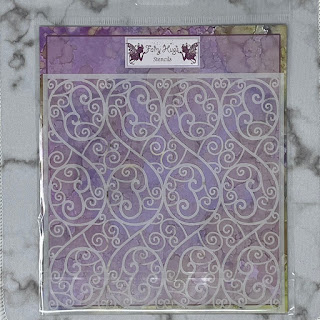
Next i took Fairy Hugs Stencil - Pebble Beach with some water on my blending brush and wiped some of the ink away to live the white type shadows.  I wanted more texture so i added molding paste to the stencil and put Distress Glaze - Kitsch Flamingo and Broken China on top of the wet paste and tapped underneath the card to make the two glazes mix. I waited a bit and then i heat embossed the glazed paste. This gives a china type finish.  I edged the card with Distress Oxide - Chipped Sapphire.
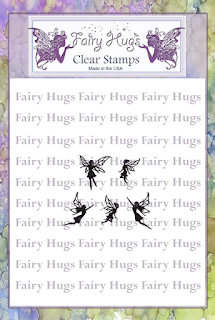
Now, i stamped the sentiment onto white cardstock and matted it in black.  I inked the top of that with Distress Oxide - Mermaid Lagoon.  I positioned the sentiment on top of the card so i could see where to stamp the fairies. I used Condo Dwellers for the fairies on this card. Now all i needed to do was adhere the sentiment to the card front and attach the card topper to the card base. 
 
Fairy Hugs Store Supplies:

Fairy Hugs Sentiment - Fairy Whispers (Believe) available Feb. 15


Like us on Facebook
Follow us on Instagram: Fairy Hugs Store
 Join our Fairy Hugs Facebook Group here

 Don't forget to include #FairyHugsStore on your projects and tag us at @FairyHugstore so we can be sure to see and comment on your projects!

Sign up to receive Fairy Hugs Newsletters at the Fairy Hugs store.

 
Thanks for stopping by!


Also used:


New Release Fairy Hugs - Sentiments Sneak Peek - Our Garden

  Hello everyone and Happy Saturday!! 

Another fun day sharing Fairy Hugs NEW sentiment release sneak peek. 
Available in the store on Feb. 15

Let's see what we can make using the NEW Fairy Hugs sentiment - Our Garden 


To create this card, i started with We Are 3 Digital Paper - Magical Scenes.
Next i stamped everything with VersaFine Clair - Nocturne. I added some gold sparkle pen to the bees, stars, wings and the centers of the lanterns. I colored in the fairy's and bee's wings. The wings and lanterns also got some sparkle paint.
 
Fairy Hugs Store Supplies:

Fairy Hugs Sentiment - Our Garden (available Feb. 15)


Like us on Facebook
Follow us on Instagram: Fairy Hugs Store
 Join our Fairy Hugs Facebook Group here

 Don't forget to include #FairyHugsStore on your projects and tag us at @FairyHugstore so we can be sure to see and comment on your projects!

Sign up to receive Fairy Hugs Newsletters at the Fairy Hugs store.

 
Thanks for stopping by!


I also used:


Friday, February 11, 2022

Fairy Hugs Sentiment - Sneak Peek - My Fairy

 Hello everyone! 
I hope you are enjoying our Fairy Hugs - Sentiment Sneak Peek Week
The Sentiment release will be in the store on Feb. 15!

Let's see what we can make using the new Fairy Hugs sentiment, My Fairy


It was easy for me to "see" what i wanted to use based on the new Fairy Hugs Sentiment - My Fairy.
I thought Fairy Hugs - Lorella was perfect.  One of my favorite stamps is Fairy Hugs - Slanted Tree.  It is has such beautiful motion.  For this card i started out with We Are 3 Digital Paper - Backgrounds Happen.  I added a moon halo with Distress Oxide.  Next i made a mask of Lorella and then positioned her where she would sit on the tree and stamped her in VersaFine Clair - Nocturne.  Then i placed the mask on top of her and stamped the tree in VersaFine Clair - Pinecone.  I left the mask in place and stamped Fairy Hugs - Heart Vine Frame in VersaFine Clair - Rain Forest. Next i stamped Fairy Hugs - Wild Roses, Flower Vines and the sentiment in VersaFine Clair - Nocturne. Last thing i did was color in Lorella's wings, dress, flowers, Wild Roses and both the Heart Vine Frame and the Flower Vines with Prismacolor Pencils.
 
Fairy Hugs Store Supplies:

Fairy Hugs Sentiment - My Fairy (available Feb. 15)


Like us on Facebook
Follow us on Instagram: Fairy Hugs Store
 Join our Fairy Hugs Facebook Group here

 Don't forget to include #FairyHugsStore on your projects and tag us at @FairyHugstore so we can be sure to see and comment on your projects!

Sign up to receive Fairy Hugs Newsletters at the Fairy Hugs store.

 
Thanks for stopping by!


I have also used:


Fairy Hugs Sentiment Release Week! Sneak Peek! Fairy Whispers - Trust

  Hello everyone and Happy Fairy Hugs Sentiment Release week!! 

Let's see what we can make using Fairy Hugs Store supplies! 

I am using Fairy Hugs Sentiment - Fairy Whispers (Trust)

I was inspired by two different cards online. Fairy Hugs has had this canoe in our store for some time and i thought the daisies matched perfectly with the canoe.  I also thought the stamps tied in with the NEW Fairy Hugs Sentiment and new beginnings.  I started out with watercolor paper.  First, i stamped the Fairy Hugs - Canoe and Daisies with Distress Oxide - Prize Ribbon using a mask for the bottom part of the Daisies stamps.  I then embossed them with Distress Glaze - Prize Ribbon. Next i had some fun.  I used Fairy Hugs - Frilly Branches and stamped those with Distress Oxide - Prize Ribbon, but before i stamped the paper i spritzed a bit of water on the inked stamp.  That created a bit of watercolor movement.  I decided to spray the paper some more to get more movement.  I heat dried it and then i ironed the back of it to make sure it was dry being careful not to mess up the embossing.  I used Distress Oxide ink to color in the flower petals and once it was dry i added a bit of Prismacolor pencil. Now i stamped the two bees with Versafine Clair Medieval Blue.  I stamped the sentiment on a scrap watercolor paper and inked around the edges with Prize Ribbon and glued that on to the design.  I used my Sparkle Gel pen (no name but it looks royal blue) and added dots throughout..i even splattered some white acrylic paint.
Next i decided to add a bit more to the background with not as much water.  Next to last thing.. i put some glitter paint on the bees wings and added some of the silver sparkle gel pen to the stripes.
Very last thing, before adhering to the card base is, i machine stitched around the card.
 
Fairy Hugs Store Supplies:

Fairy Hugs NEW Sentiment - Fairy Whispers ( Trust).  Available Feb. 15


Like us on Facebook
Follow us on Instagram: Fairy Hugs Store
 Join our Fairy Hugs Facebook Group here

 Don't forget to include #FairyHugsStore on your projects and tag us at @FairyHugstore so we can be sure to see and comment on your projects!

Sign up to receive Fairy Hugs Newsletters at the Fairy Hugs store.

 
Thanks for stopping by!

Thursday, February 10, 2022

NEW Fairy Hugs Sentiment Release Sneak Peek - Live Forever

  Hello everyone and Happy Sneak Peek Week!! 

Let's see what we can make using the NEW Fairy Hugs sentiments release! 

I am using Fairy Hugs Sentiment - Live Forever (available in the store Feb. 15)

This was a fun card to create using the NEW Fairy Hugs sentiment - Live Forever as my inspiration.
I wanted to use an excited fairy and felt that Fairy Hugs - Alexa was perfect for this emotion!
I started out with We Are 3 Digital Paper - Backgrounds Happen.  Next i made a stencil using Tutti Designs - 145 Snowglobe Scene.  I cut out the die and used the outside as my stencil. I made sure to keep the cut out die from the base so i could use it on the card. 

Next i used the stencil by inking up the scene, making a moon and clouds.  Next i positioned the sentiment and the fairy so they would fit in the snow globe shape. I did some coloring on the fairy, her wings and the flowers at her waist and i added some sparkle gold gel pen to her wings, necklace and shoe bows. I stamped Fairy Hugs - Flower vines surrounding the snow globe and i added Fairy Hugs - Whimsical Flowers to the base of the card.  I decided to stitch around this design to the white mat.  Once i adhered the layer to the card base, i inked up the snow globe die cut base lines the same color ink i used on the background of the snow globe scene and highlighted the pieces in the sparkle gel pen.  Last thing, i added some glossy accents to the globe just above the die cut strip from the snow globe base and used iridescent seed beads to look like a faux snow globe.  I added a few seed beads around the fairy too. 
 
Fairy Hugs Store Supplies:
Fairy Hugs Sentiment NEW release - Live Forever (available Feb. 15)


Like us on Facebook
Follow us on Instagram: Fairy Hugs Store
 Join our Fairy Hugs Facebook Group here

 Don't forget to include #FairyHugsStore on your projects and tag us at @FairyHugstore so we can be sure to see and comment on your projects!

Sign up to receive Fairy Hugs Newsletters at the Fairy Hugs store.

 
Thanks for stopping by!


Also using:


Fairy Hugs NEW Sentiment Release - Wish Come True Tutorial

  Hello everyone and Happy Sneak Peek Week!! 

Let's see what we can make using the NEW Fairy Hugs sentiments release! 

I am using Fairy Hugs Sentiment - Wish Come True (available in the store Feb. 15)

This was a fun card to create using the NEW Fairy Hugs sentiment - Wish Come True as my inspiration.  I thought it would be so fun to have a tiny little letter from a fairy. The sentiment was a perfect size so i started with the little letter and made an envelope to fit.  I wanted the letter to be the focus so i made an easel card.  This is what the card looks like when it is closed:
 
and what it looks like from the back/side when opened:

 i made a little YouTube tutorial for the Mini Fairy Letter and Envelope


* YouTube Easel Card Tutorial will be live on Feb. 11


For the rest of the card, this is what i did.  I first made my card base.  To make this easel card, i made the standard fold and then the top layer of the card i folded in half.  Those two sections are what i created next.  Figuring out those measurements, i cut the two pieces i was going to stamp on, knowing i would be matting them after i stamped.  I positioned the stamps where i wanted them on those two pieces and stamped them, i kept in mind where i would add the envelope/letter. When i stamped the fairy Fifi, i stamped her in VersaFine Clair - Nocturne and the Dandelions in VersaFine Clair - Morning Mist.  I stamped the Dandelions purposely in a lighter ink because i wanted to color the stem/leaves in with a pencil.  I did heat emboss the "flower" with Ranger's Bridal Tinsel embossing powder to get the sparkly look. Next i randomly added the dandelion seeds from the fairy Fifi set.  Next i stamped another NEW Fairy Hugs release stamp - Fairy Whispers (Thinking of You) and added some gems to the centers of the Dandelion "flower".  The reason i added the gems was so that the easel would stay open when propped up. 

Fairy Hugs Store Supplies:
Fairy Hugs Sentiment NEW release - Wish Come True (available Feb. 15)

Fairy Hugs Sentiment NEW release - Fairy Whispers (7 one line sentiments) 


Like us on Facebook
Follow us on Instagram: Fairy Hugs Store
 Join our Fairy Hugs Facebook Group here

 Don't forget to include #FairyHugsStore on your projects and tag us at @FairyHugstore so we can be sure to see and comment on your projects!

Sign up to receive Fairy Hugs Newsletters at the Fairy Hugs store.

 
Thanks for stopping by!


Also using: