Pages

Showing posts with label Fairy Hugs Sentiment - Listen. Show all posts

Thursday, June 30, 2022

Fairy Hugs - Listen

 Hello everyone and Happy Thursday!! 

I am a DT for Fairy Stamper Hugs!
It is the #1 USA Retailer for Fairy Hugs Stamps
Check out the store here!!
 

Very simple card!  I started with Fairy Hugs Craft Paper - BumbleTwinkle for the background paper.  Nest i used Fairy Hugs Craft Paper - WinkleBush to cut out the Fairy Hugs Enchanted Dies - Nightglow Toadstools.  Before i added the toadstools to the background paper i placed them on the paper to see where Fairy Hugs - Bryla should be stamped.  So i stamped her with VersaFine Clair - Nocturne.  Next is creating a ground.  I used some torn paper and made the ground using Distress Oxide Ink Frayed Burlap.  Now i adhered the toadstools.  Next i stamped Fairy Hugs - Frilly Branches and Fairy Hugs Sentiment - Listen. I mixed up some gesso and Distress Oxide Ink - Frayed Burlap to to paint inside of the toadstools.  I also colored in Bryla's wings and her outfit with Prismacolor pencils.  I also added some acrylic hologram paint on top of her wings.

 
Fairy Stamper Store Supplies:


Fairy Hugs Craft Paper - BumbleTwinkle (background paper bottom row - right)

Fairy Hugs Craft Paper - WinkleBush (toadstool paper bottom row 4th from left)


Like us on Facebook
Follow us on Instagram: Fairy Stamper Hugs
Join our NEW Fairy Stamper Hugs Facebook Group here

 Don't forget to include #fairystamperhugs on your projects and tag us at @FairyStamperHugs so we can be sure to see and comment on your projects!

Sign up to receive Fairy Stamper Newsletters at the Fairy Stamper store.

Thursday, June 23, 2022

Fairy Hugs Enchanted Dies - Lantana's Garden - Journal Cover, Mini Album Cover or Card?

Hello everyone and Happy Thursday!! 

I am a DT for Fairy Stamper Hugs!
It is the #1 USA Retailer for Fairy Hugs Stamps
Check out the store here!!


Beautiful Journal, Mini album or card cover! 
How i made this project.  I started out with the NEW Fairy Hugs Enchanted Die called, Lantana's Garden.  I die cut this from a piece of purple paper from Fairy Hugs Craft Papers - WinkleBush.  Next i backed the die with a paper from Fairy Hugs Craft Papers - TangleWhisper. I colored in the die with Prismacolor Pencils and added some gems. Next, i used a piece of paper from Fairy Hugs - BumbleTwinkle and die cut a small circle from the center of the paper (knowing that i would hide the cut out hole left in the paper with the top layer. Then i stamped Fairy Hugs - Frilly Branches throughout the rest of the paper as shown. I stamped the Fairy Hugs Sentiment - Listen in the center of the circle and added the tips of the Fairy Hugs - Frilly Branches stamp. I distressed the circle sentiment and the background stamped paper.  I layered up everything keeping a 3/4" border for my ribbon closure.  For the ribbon closure, i hole punched the side and thread ribbon through each hole both ways. 

Fairy Stamper Store Supplies:
 Don't forget to include #fairystamperhugs on your projects and tag us at @FairyStamperHugs so we can be sure to see and comment on your projects!

Sign up to receive Fairy Stamper Newsletters at the Fairy Stamper store.

Saturday, June 18, 2022

Fairy Hugs New Enchanted Die Release - Garden Cottage

Hello everyone and Happy Sneak Peek Day! 

Fairy Hugs will be releasing a brand NEW product to the Fairy Hugs line on June 20th!
Fairy Hugs Enchanted Dies!!

Let's see what we can make using Fairy Hugs Store supplies! 

I am using Fairy Hugs Enchanted Die - Garden Cottage!

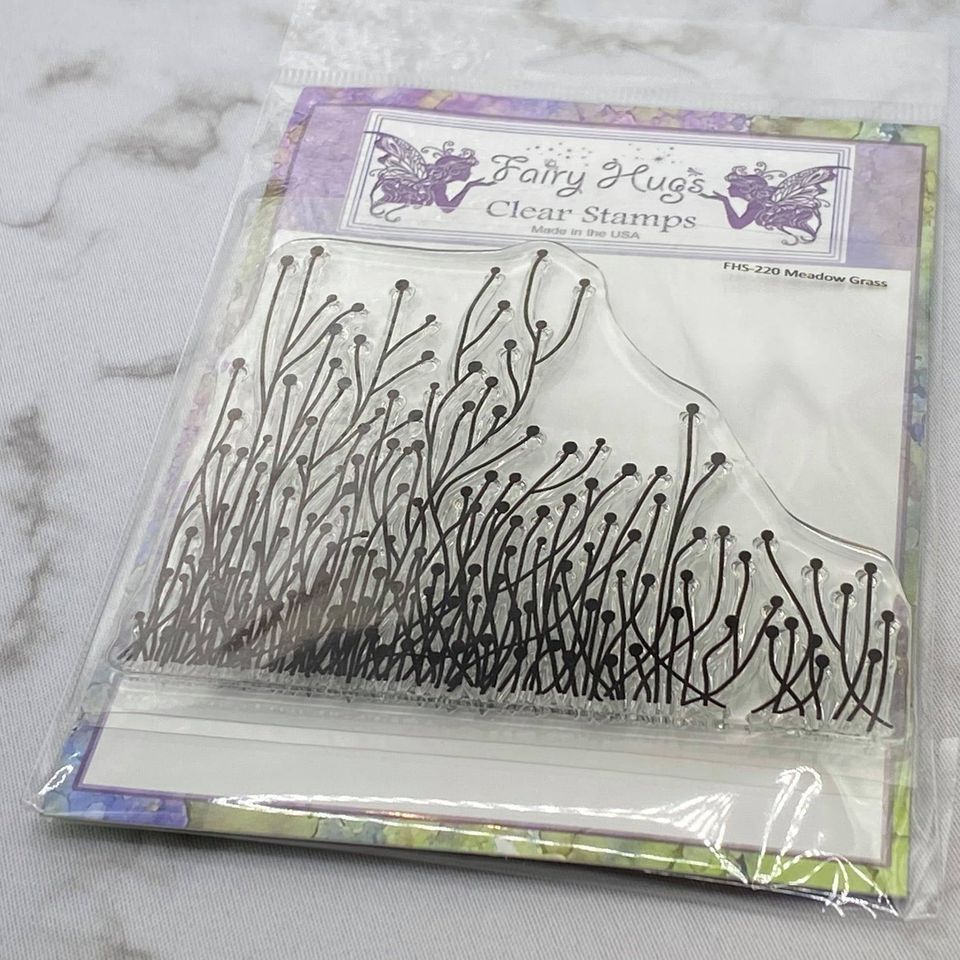
For this card,  I started with the brand NEW Fairy Hugs Craft Papers - TumbleShine.  I then used another NEW Fairy Hugs Craft Papers - WinkleBush to cut out the Garden Cottage.  I cut the Garden Cottage out 3 times.  One in the purple and another in the brown from WinkleBush. Then i used a green paper i had in my stash. I saved all of the negative pieces to use in other Garden Cottage die cuts.  For this card, i used the purple for the main die cut and the brown negative pieces from the brown die cut.  I used the green for my base and built on top of that.  I fussy cut the purple flowers and adhered them on top of the green base flowers. When i cut out the door it was die cut all the way around except for the threshold.  I decided i wanted my door to open so, i decided to cut along the threshold and re-attach the door on the right with double sided tape.  Before i attached the door i hole punched the handle and added a brad.  So before i glued the garden cottage on the background paper, i figured out the placement of Fairy Hugs - Meadow Grass and the fairy, Fairy Hugs - Mordibella and then i stamped the fairy with VersaFine Clair Ink Nocturne and the grass and sentiment with VersaFine Clair Ink - Rain Forest.  Now i added the Garden Cottage and did some torn paper inking for the grass.  I colored in the fairies wings using colors to match the papers.

Fairy Hugs Store Supplies:
Fairy Hugs Enchanted Die - Garden Cottage


Fairy Hugs Craft Paper - TumbleShine

Like us on Facebook
Follow us on Instagram: Fairy Hugs Store
 Join our Fairy Hugs Facebook Group here

 Don't forget to include #FairyHugsStore on your projects and tag us at @FairyHugstore so we can be sure to see and comment on your projects!

Sign up to receive Fairy Hugs Newsletters at the Fairy Hugs store.

 
Thanks for stopping by!

Wednesday, May 11, 2022

It is spring time! Tutti Designs - 738 Spring Trunks

Hello!  Let's see what you can create with Tutti Designs today!


For this card i started with a 5 x 7" background and did some inking with torn paper and a diecut circle template. This card is a really easy card to make once you have inked your background.
I die cut Tutti Designs - 738 Spring Trunks from black cardstock.  I wasn't able to capture the wonderful details of this die in my photo.  Please check out the photo of the die below.  It's such a pretty die and works wonderfully with other dies and stamps! I also inked up some more paper using the same color pink to stamp my sentiment on. I die cut the sentiment and circle matting it from Tutti Designs - 415 Dotted Nesting Circles.   I matted the inked background in mirror/metallic card.  Then i adhered that to the card base.  Last, i adhered the trees and sentiment to the top of the card!

I have used:


Be sure to visit Tutti Designs
for LOTS more fabulous dies and
come back again for more Tutti Designs inspiration!

Here are some Tutti Designs quick links:

Also used:


Thursday, March 24, 2022

Fairy Hugs - Badgers - look like Beavers

 Hello everyone and Happy Thursday!! 

I am a DT for Fairy Stamper Hugs!
It is the #1 USA Retailer for Fairy Hugs Stamps
Check out the store here!!
 

Just a glorious woodland day!!
For this card i started out with We Are 3 Digital Paper -  Moody Night and resized it to be 5" x 7".
Next i started some stamping! To create the log going across the bottom, i used Fairy Hugs logs and pieced the two ends together.  Last thing i did was color in some of the images. 

Fairy Stamper Store Supplies:
Fairy Hugs - Badgers (look like beavers)


Like us on Facebook
Follow us on Instagram: Fairy Stamper Hugs
Join our NEW Fairy Stamper Hugs Facebook Group here

 Don't forget to include #fairystamperhugs on your projects and tag us at @FairyStamperHugs so we can be sure to see and comment on your projects!

Sign up to receive Fairy Stamper Newsletters at the Fairy Stamper store.

Monday, February 14, 2022

Sneak Peek - New Release Fairy Hugs Sentiments - Listen

 Another great day of sharing a NEW Fairy Hugs Sentiment Release Sneak Peek.
Release Date - February 15th

Let's see what we can make using Fairy Hugs Store supplies! 

I am using the NEW Fairy Hugs Sentiment - Listen 

I love hearing wind chimes outside, 
maybe not quite the same as just quietly listening outside to the trees and nature. 
For this card, i did some inking in the background.  One of my favorite things to do to make scenes.
Next i stamped everything in VersaFine Clair - Nocturne.  The lighter bluebells are stamped with VersaFine Clair - Morning Mist. Next i colored the images with Prismacolor pencils and with a gold glitter gel pen.

Fairy Hugs Store Supplies:

Fairy Hugs Sentiment - Listen (available Feb. 15)


Like us on Facebook
Follow us on Instagram: Fairy Hugs Store
 Join our Fairy Hugs Facebook Group here

 Don't forget to include #FairyHugsStore on your projects and tag us at @FairyHugstore so we can be sure to see and comment on your projects!

Sign up to receive Fairy Hugs Newsletters at the Fairy Hugs store.

 
Thanks for stopping by!