Pages

Showing posts sorted by relevance for query bow card. Sort by date Show all posts

Thursday, January 29, 2015

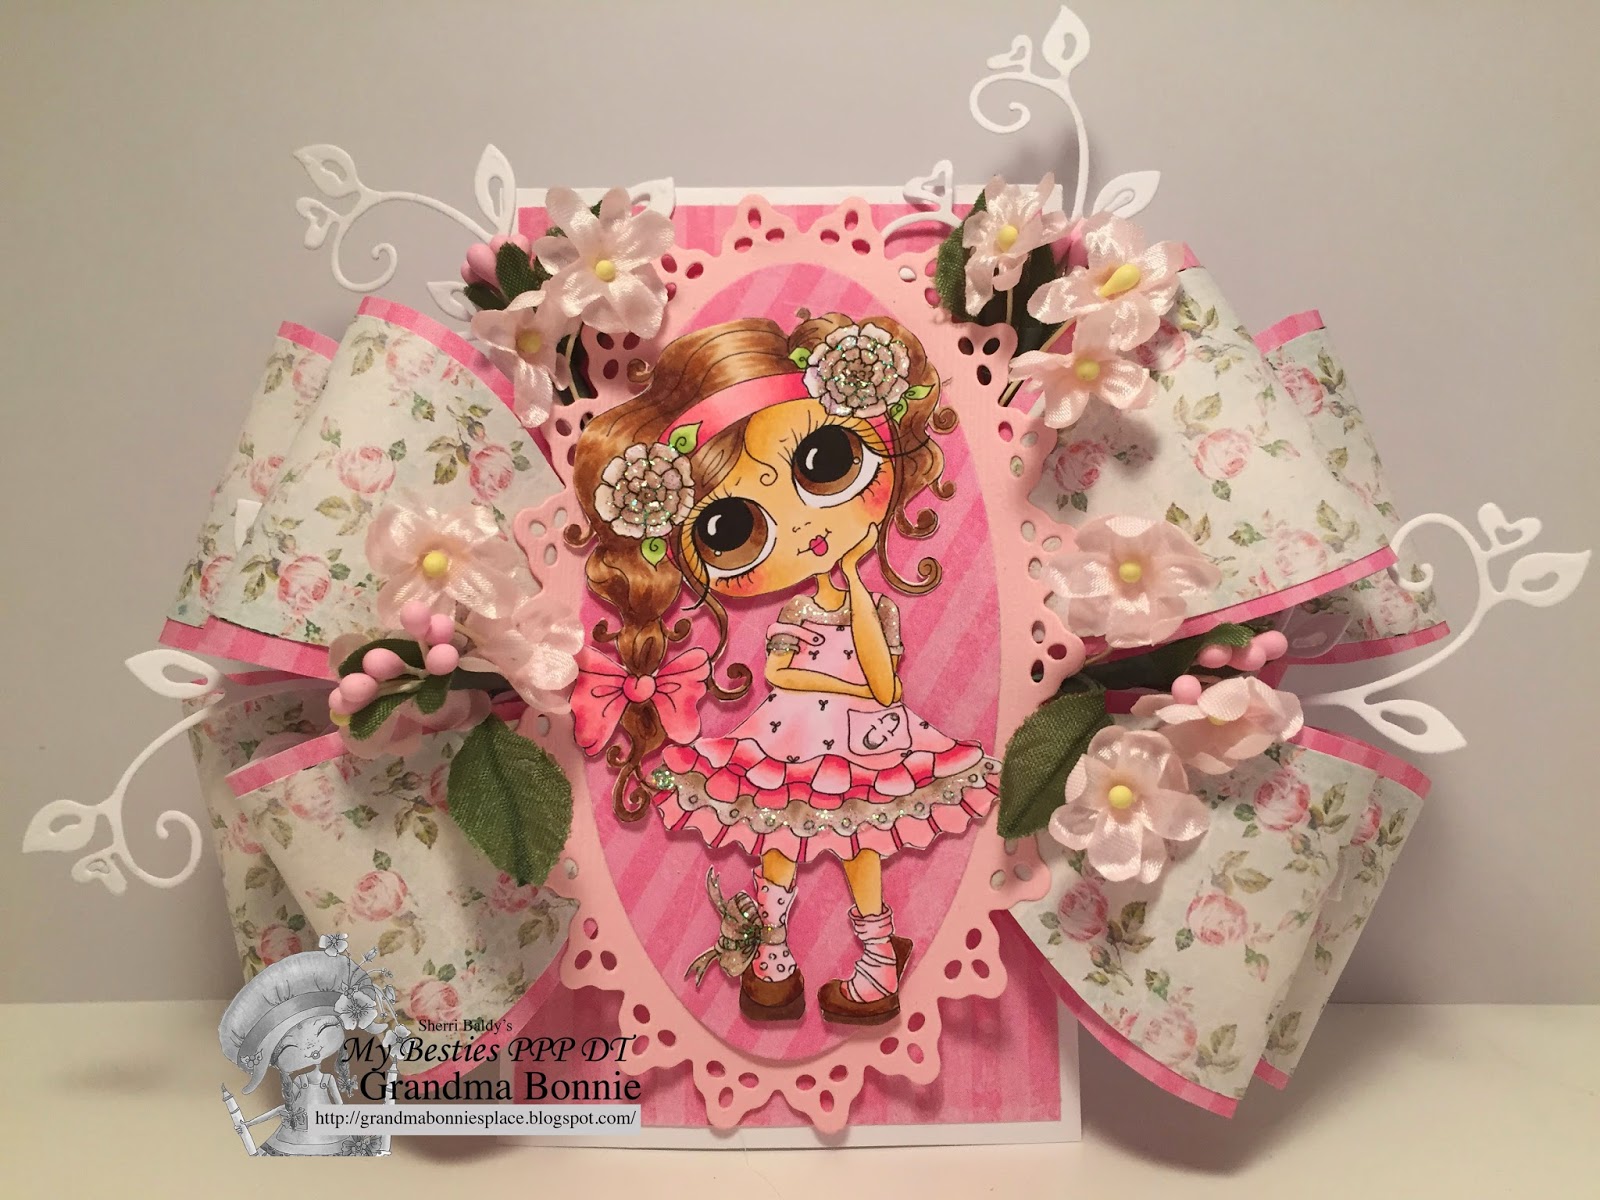
Sherri Baldy's My Besties PPP Challenge- Anything Goes/Flowers plus Bow card Tutorial

For the next two weeks at My Besties PPP Challenge blog we have another great challenge for you!

** Note our new name**  PPP = Pretty Pre-colored Printables

The challenge theme is- Anything Goes w/opt of Flowers

To participate in our My Besties PPP challenges go here

For this project i am using a My Besties digital image i colored called Besties Bee found here and a Printable Tag #13 found here.

I have also used two of Sherri Baldy's dies.  The Love die found here and the outlined hearts found here.

The white flourish heart die is a border i cut in sections from Memory Box.

Bow tutorial:
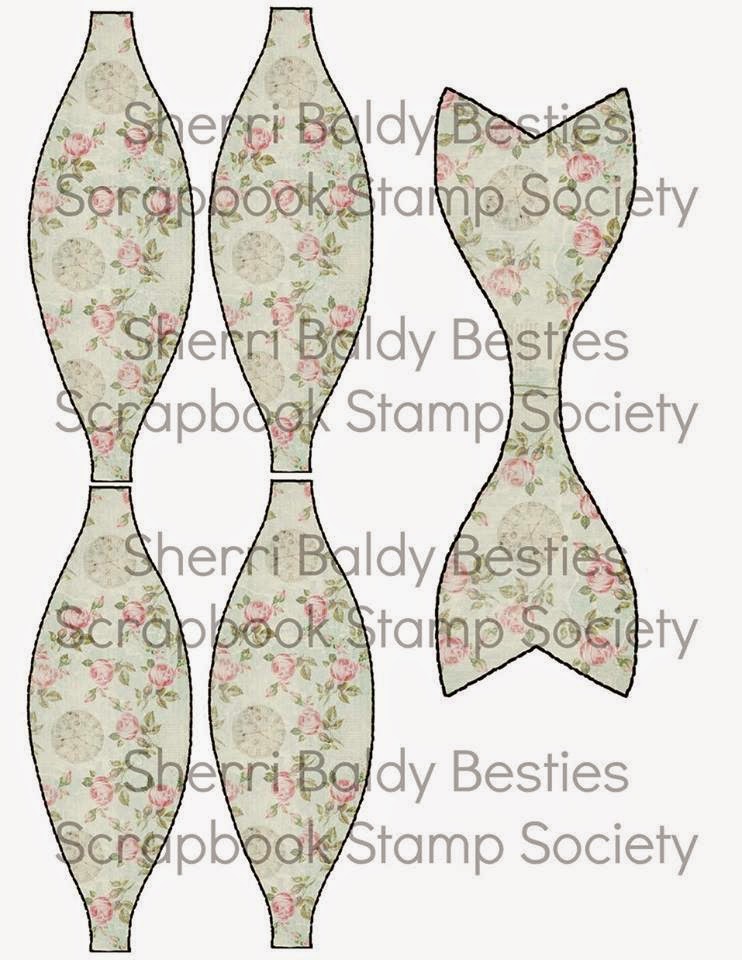
Step #1.  Enlarge tag to 3" high. Flip one tag. Print out tags and cut out tags. Mat on brown paper and 1" extended. Trim corners and make tails. Cut out bow sections. Here is the link to the pattern for the bow sections.
Step #2. Place the two tags on vertical card base (i matted mine and used a spiral punch at the top). Adhere...this will take the weight of the bow so secure well.

Step #3 Glue bow sections together
Step #4. Attach bow sections securely as shown
Step #5. Make smaller bow sections and add to the center. Cut out a matted oval and place over center. Add your image and embellish your card. It will stand up because of the vertical card base. Looks pretty on a mantel..or large area. This card is 11.5" wide.

Finished card close up:


You should also check out my PPP  team mates awesome designs..the links are below:

Julie Team Leader
Andrea N.
Andrea
Annette
Deirdre
Luana
Tonnie
Bonnie (me)

Challenges:
Lunagirl Moonbeams challenge- Honeybee
4 Crafty Chicks- Anything Goes
DL Art- Thursday challenge- Valentines

Thursday, March 19, 2015

Just a reminder for My Besties PPP and a Sweet Bow card.

You have one more week to enter your card/project at My Besties PPP Challenge blog!

The challenge theme is- Anything Goes with optional Lace, Ribbon or Twine

To participate in our My Besties PPP challenges go here:

For this project i am using a My Besties Printable Bow card found at Scrapbook Stamp Society here.  I have also used the image Ashley Isabella also found at Scrapbook Stamp Society here.

To make this bow you will need to print off 8 loops.  I have made a tutorial for another bow card that will show you how to put the bow together here.

This printable bow sheet is fun and easy to use!  They are all pre-colored for you, all you do is print out your sheets, cut out the pieces put it together.

Dies i used:
Life Style Crafts, lace oval and basic oval.
Doo Hickey- heart vine

Bow printable used:


Friday, March 31, 2023

Tutti Designs - 748 Floral Hoops

Hello!  Let's see what you can create with Tutti Designs today!


I decided for this card, that i wanted to create a simple easel card. 
Below i took many photos in case anyone would like to create something similar. 

Ink up some paper for he die cut.  
I used Distress Oxide Squeezed Lemonade and Mowed Lawn


I decided that the die needed a bit more color so i added 
Distress Oxide - Mustard seed to the yellow parts.

I wanted to back the die with a white, but it was too plain, so i inked up some scrap paper with 
Distress Oxide - Lost Shadow and Pumice Stone.  
Then i added some clear embossing powder. 

I used the outside die that comes with this set of 3 floral dies to back the die cut.


So next, i wanted to fill in the back with blue ink so there would be a contrast. 
I used Distress Oxide - Broken China.

Except for the larger piecees, I left the die pieces in the die 
and poked out what i needed as i added them. 

Turns out this lovely piece of paper was perfect to back the Floral Heart Frame.


Next, i felt the floral hoop needed a bow and one of the choices from the Fancy Bow set worked great.
I cut it out twice and glued one of them to white scrap paper.  
Then i fussy cut it out leaving a bit of a border.

I added the fussy cut bow to the card with double sided foam tape.

I raised up the top piece with foam tape in the center of the bow and curled up the bow.

Now for the inside of the card, i needed to finish it also because it is an easel card.
I cut out another Floral Heart Frame.  I needed to cover up the heart, so i cut out a heart that was a bit larger than than the frame heart from white card stock.  I then cut 2 more hearts from the scraps from the backing paper from the cover.  I pulled out Fairy Hugs Sentiment - Love at Christmas (i have two of these sentiments and cut this one apart to get the words "With Love") and stamped it on the larger green heart at the top.


In order for the front to stand you need to have something that will keep it from sliding closed. I used the green hearts and attached them with double sided foam tape.
You can see the finished card at the top to see how it worked!

I have used:


Be sure to visit Tutti Designs
for LOTS more fabulous dies and
come back again for more Tutti Designs inspiration!

Here are some Tutti Designs quick links:

Also used:


Friday, April 3, 2015

Sami Stamps "Egg"cellent new release called "Easter Egg Fairies" featuring a bow card & 3D egg

Every 1st, 3rd and 5th week of the month,  i look forward to the new release that  Sami Stamps  creates.  This time the release is called "Easter Egg Fairies"!

The challenge at Sami's Stamps is to use a Sami Stamp and to Paper piece.
  
Please come and play, we'd love to see what you can create.  Don't forget, Sami always offers a freebie so anyone can play along!

We have a new Sami Stamps Facebook group with Freebees as well. Check us out here.

To go to the Sami Stamps challenge click here.

I love this sweet whimsical image called "Rose Easter Egg".  I have done this image in Pink and Blue and paper pieced the rose and turned it into 3D layers.


3D view:

Blue version:

3D view:

Dies used:
Lace on card base- Cheery Lynn

Bow Tutorial:
Bow card tutorial can be found on my blog here. For this card i shortened the bow tails.

Here is the fun new release:

Want to see some more inspiration using these images?  You can check out my team mates blogs featuring them as well.
Challenges:

Monday, March 5, 2012

Snow date cardmaking #2

This is the second card in our Snow Date cardmaking.  This card was inspired by Magnolia Ink Easter issue from last year page 24 and has a lot more steps.  Also it was intended to be on the cover of a gift bag...i made it into a card.

here are the supplies i used: (my suggestion is to read ALL of the instructions first)
6.25 x 4.25 card base (used vertically)
4 x 6.75 cream base (i allowed for the border punch) (trim back to fit inside card base once you punch the one end) (see below photos)
Purple to fit inside of the cream base
3.75 x 1" cream strip for border (same cream as above)
3.5 x 3.75 tan (again i allowed for the border punch) (once you punch the border you will trim back to 3.75 x 2.5") (see below photos)
3.75 x 2.5 green paper
Large scallop or circle- 3.75 purple
Doily or circle- 3.50- cream
Small scallop or circle- 2.75- purple
Smallest circle- 2"-cream
Easter sentiment cut at 3" long
border punch, leaf punch, flowers
purple ribbon
Image- I used the Tilda leaning over...any image or die cut would work here.

Punch the short end of your cream paper 4 x 6.75 and then cut the other short end so that the paper fits on your card base..i allowed for a bit of white to show as a mat.  Mat the purple paper to the inside of the cream w/the border showing at the top.
 Now you are going to punch your cream border strip (3.75 x 1") set aside.  Punch your  tan paper (3.75 x 3.5)  on the short side.  Once you punch your tan paper you will need to cut back the other short side so that this piece now measures 3.75 x 2.50.
 Now place your green piece above your tan piece (i dry run these pieces and then tape them all down...there is a bit of adjustment allowed w/the cream border strip)  Once you like the placement tape it down.
 Now we will start working on our circles..just like lasagna you will layer the colors..purple, cream, purple, cream.  Attach them in that order and foam dot them to your card.  You will need to allow room for your ribbon and sentiment at the top and some room for the flowers at the bottom (check out the last photo to see what i mean)
Now i know in the magazine, this is made for a gift bag, but i liked the touch of ribbon at the top, so i allowed for it.  What i did was hole punch the top..measuring 1" in from the sides.   Then i pulled the ribbon through and taped the ends to the back.  Once the ribbon is attached you can adhere the piced to the card base.
 I added a bow, but i attached the sentiment first so that the bow placement didn't cover the words.  To see a great tutorial for making this sentiment standout go here.
This is the image i will color and use on this card...she is off to the side...and will be placed in the center.
This is the finished card w/out the image.
My finished card w/a Magnolia stamp


Challenges:
Magnolia Stamp Lovers- Punches (Leaning Tilda found here)