Pages

Showing posts with label Fairy Hugs - Woodland Flight. Show all posts

Friday, February 3, 2023

Tutti Designs - Overload of Love - Card Tutorial

Hello!  Let's see what you can create with Tutti Designs today!


For this card, i have made a step by step photo tutorial
First i cut out Tutti Designs - Spooky Fun (truck) i cut the truck part out and fussy cut the web/and ghosts out that were still attached. i cut out just the bottom part with the tires from black card stock and fussy cut those. Next i cut out several hearts (total of 10) using Tutti Designs - Nesting Stitched Hearts and i cut out one set of fall out hearts from Tutti Designs - Love Hanging.

Next i glued the truck onto gray card stock. 

Once the truck was fussy cut, i glued on the heart to cover up the bat on the door, and i glued the tires onto the truck. I hole punched a hole in the middle of the tire so i could add a pink brad.

This is what it looks like once the tires, heart and brads are on.

Next i used double sided foam tape and attached the truck to the paper scene.  Then i arranged the 10 hearts as shown and glued them in place.
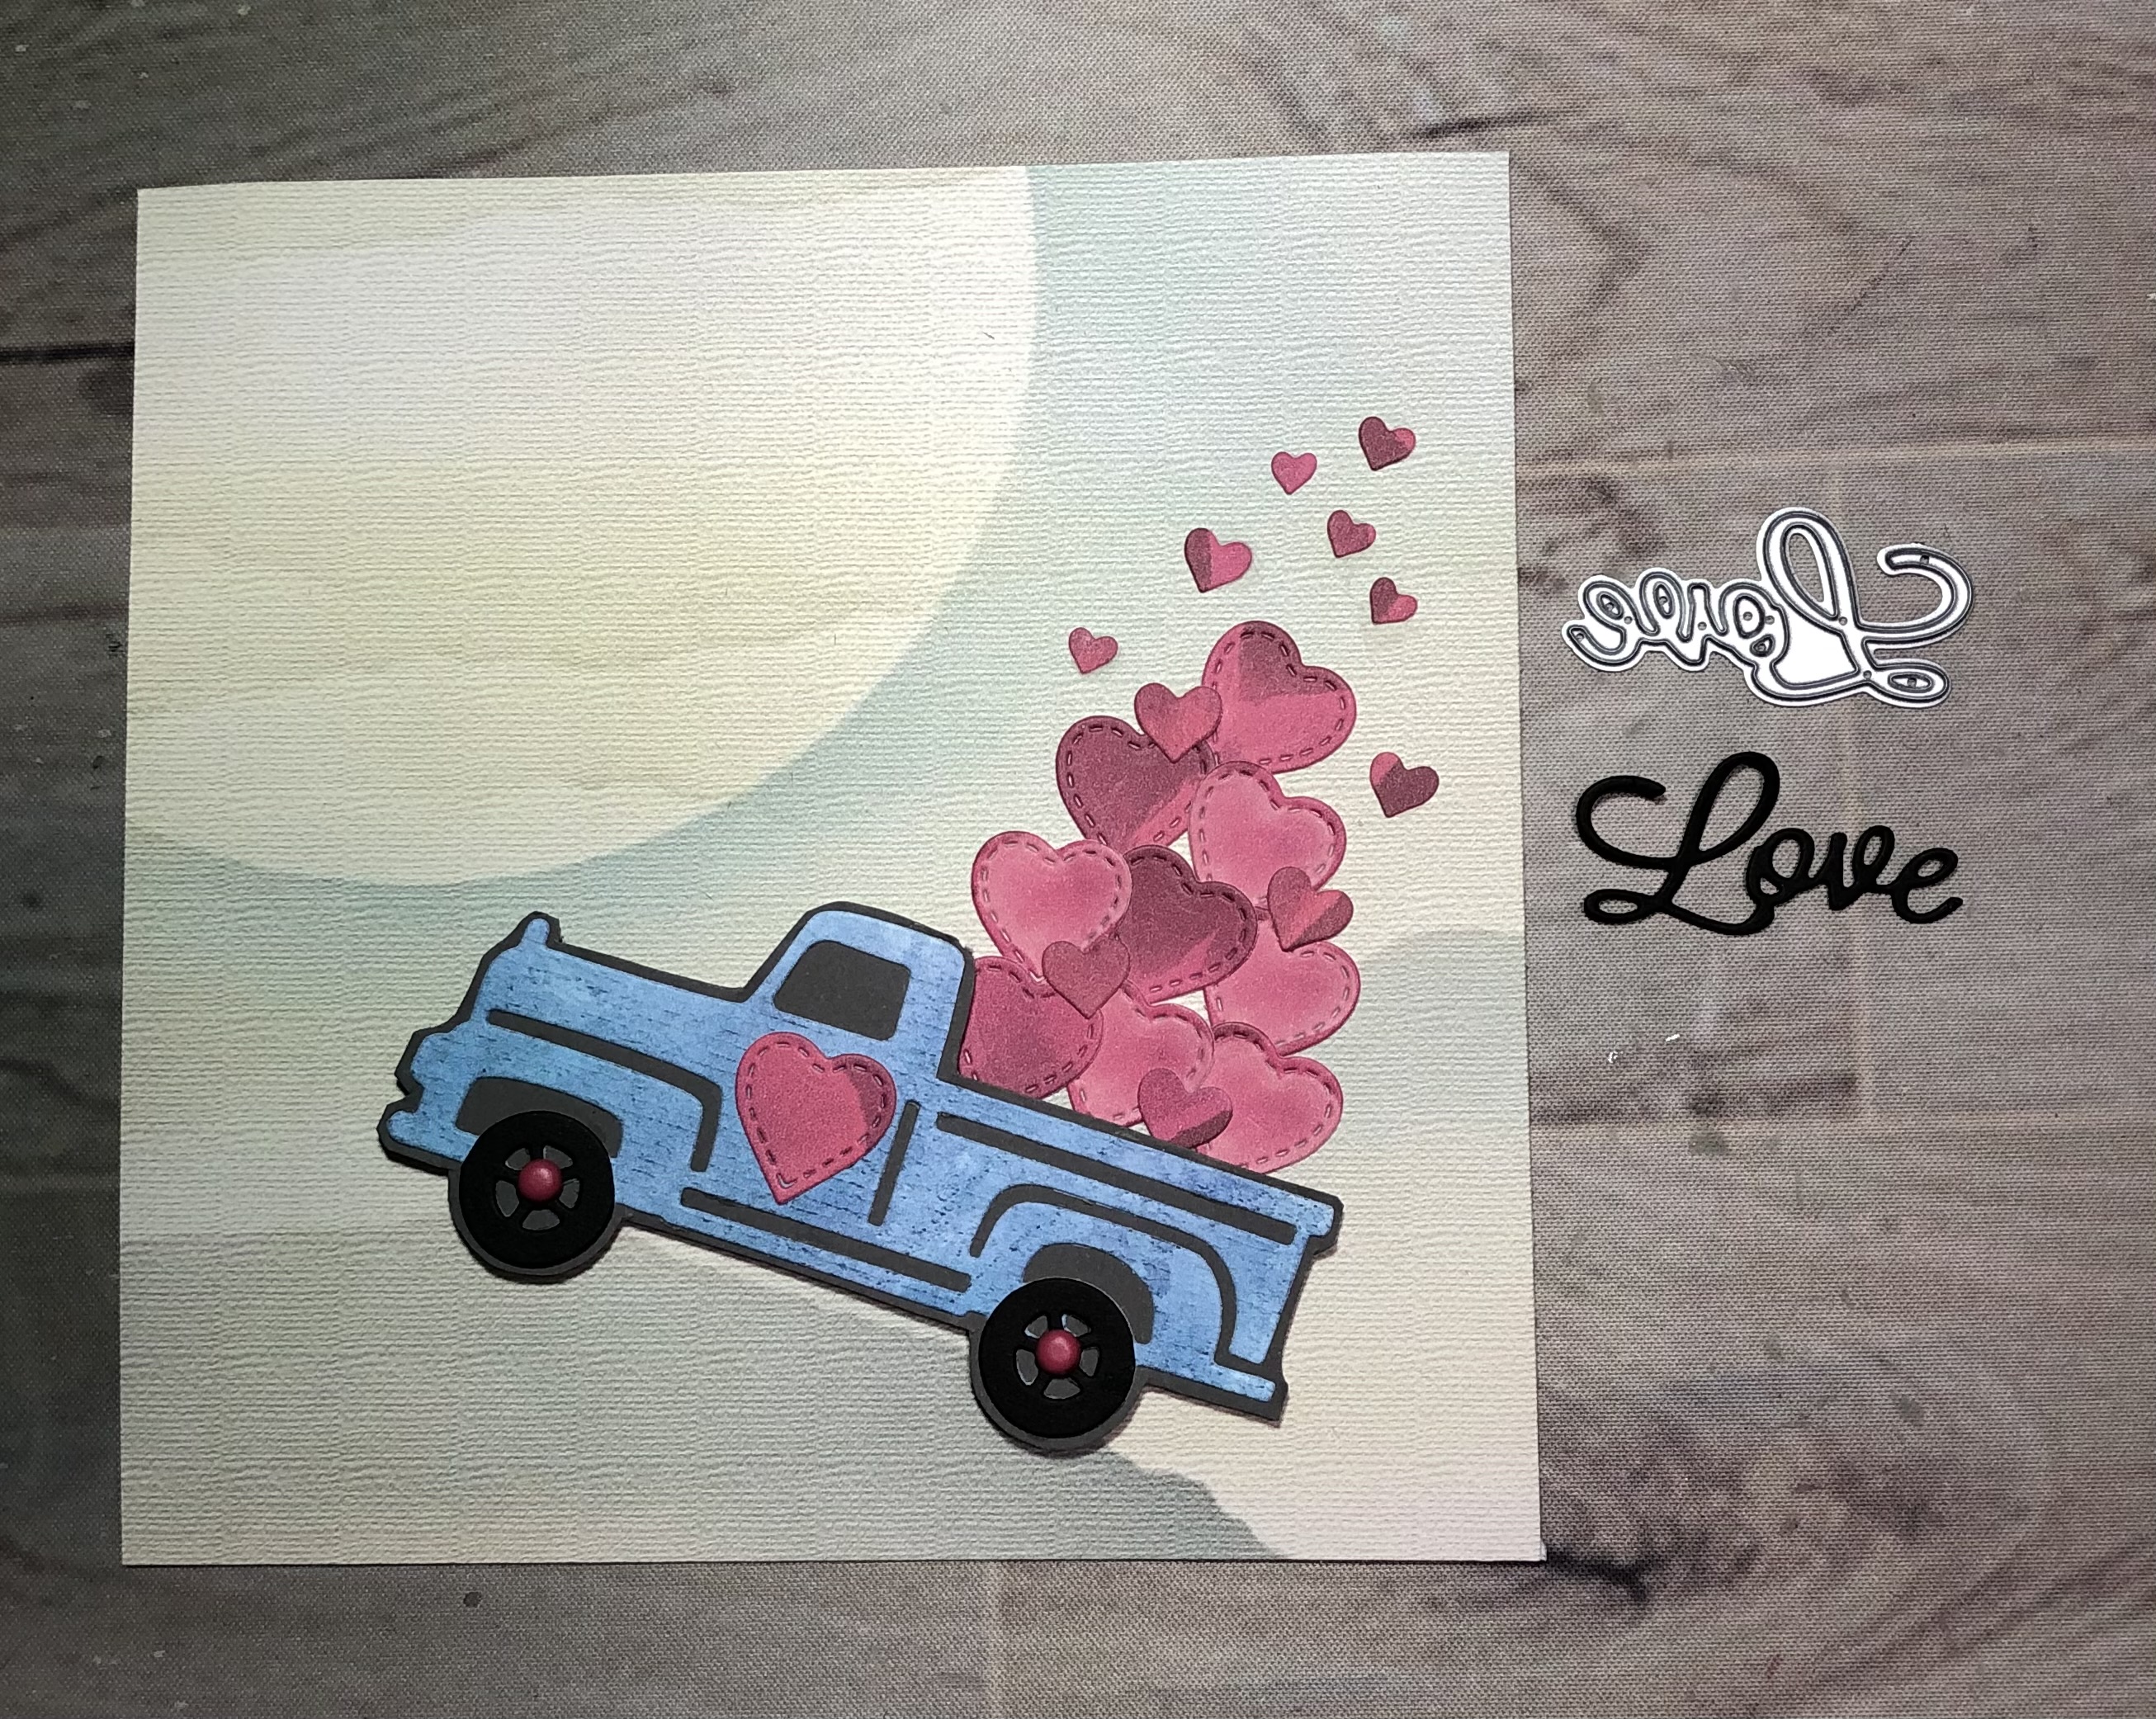
Last 3 things, i added the tiny hearts and i die cut Tutti Designs - 232 Word Set Love and i stamped Fairy Hugs - Woodland Flight (birds) as shown on the finished card at the top.

I have used:
Be sure to visit Tutti Designs
for LOTS more fabulous dies and
come back again for more Tutti Designs inspiration!

Here are some Tutti Designs quick links:

Also used:

Wednesday, January 18, 2023

Tutti Designs - 764 Holiday Foliage Window

Hello!  Let's see what you can create with Tutti Designs today!


For this card, i have combined two of my favorite companies on one card.  
They complement each other!
My inspiration is Tutti Designs - 764 Holiday Foliage Window. I think it works for anytime.
Once i decided on the die i needed to find what would work with it.  So my first pick was Fairy Hugs Craft Papers -  TumbleShine.  I love that they have circle scenes and this fit perfectly in the die opening. Next i "auditioned" some Fairy Hugs fairies.  I found several i liked, but chose Fairy Hugs - Azalea.   She needed some friends to listen to and so i chose Fairy Hugs - Woodland Flight (tiny birds).  I stamped those as shown.  Next i wanted to add something to the corners..although they looked great plain or could have had some stenciling on them. However, i chose Fairy Hugs - Ivy Corners.  I colored in the Ivy and Azalea.  I popped up the window with foam tape. It would make a great shaker too!!

I have used:

Be sure to visit Tutti Designs
for LOTS more fabulous dies and
come back again for more Tutti Designs inspiration!

Here are some Tutti Designs quick links:

Also used:


Wednesday, January 11, 2023

Take Two.. Tutti Designs - Birdhouse Garden.. Simple card!

Hello!  Let's see what you can create with Tutti Designs today!

One of our Tutti Designs customers requested some samples for 
Tutti Designs - Birdhouse Garden.
Today i am sharing a simple card cutting the die as is.

For this card, i die cut Tutti Designs - Birdhouse Garden from Fairy Hugs Craft Papers - FrostFlight.  I cut this die in the middle of the paper so that i could use the outside as a mat to "match".
The background paper is from Fairy Hugs Craft Papers - TumbleShine. This card was super easy as i just glued the die to the background paper. I had saved the heart from the last Birdhouse card i made.  I stamped one bird from Fairy Hugs - Woodland Flight and Fairy Hugs Sentiment - Fairy Whispers.

I have used:

Be sure to visit Tutti Designs
for LOTS more fabulous dies and
come back again for more Tutti Designs inspiration!

Here are some Tutti Designs quick links:

Also used:

Fairy Hugs Craft Papers - FrostFlight (birdhouse die color and mat)


Wednesday, January 4, 2023

Tutti Designs - Birdhouse Garden in "layers" tutorial

Hello!  Let's see what you can create with Tutti Designs today!

One of our Tutti Designs customers requested some samples for 
Tutti Designs - Birdhouse Garden.
Today i am sharing one example with fussy cutting layers.
Next week i will share a simple card cutting the die as is.


For this card, i can show you the layers i cut apart and put back together.  I built the layers on top of Fairy Hugs Craft Papers - BumbleTwinkle.


You can see how i cut out the layers above and then glued them on top of each other. Check out the top photo to see how i stamped Fairy Hugs - Woodland Flight and added some of the negative green flowers to join the cut grass sections.

I have used:

Be sure to visit Tutti Designs
for LOTS more fabulous dies and
come back again for more Tutti Designs inspiration!

Here are some Tutti Designs quick links:

Also used:


Thursday, October 27, 2022

Fairy Hugs is sponsoring the Cat Lovers Hop 2022 - Ed and Nala say, "hi"!

Fairy Hugs is sponsoring 2022 Cat Lovers Hop - Oct. 24- 29
Fairy Hugs special day is Oct. 27
Fairy Hugs Prize is the two cat stamps shown on this banner.
Fairy Hugs is offering a special 15% off discount during this hop. www.fairyhugs.com
Code CATHOP is valid on Oct. 27 ends Nov. 6.
Join the Cat Lovers Hop and win prizes!


Just some fun stamping and coloring for this card! 

i have used:
Fairy Hugs - Ed
Fairy Hugs - Nala
Fairy Hugs - Mini Fairy Nests
Fairy Hugs - Woodland Flight
Fairy Hugs - Stacked Books
Fairy Hugs Craft Paper - MorningWillow

Thank you for stopping by!

Thursday, October 13, 2022

Fairy Hugs - Anora taking a morning walk

 Hello everyone and Happy Thursday!! 

I am a DT for Fairy Stamper Hugs!
It is the #1 USA Retailer for Fairy Hugs Stamps
Check out the store here!!
 

To create this card i started with Fairy Hugs Craft Papers - MorningWillow. I stamped Fairy Hugs - Anora in VersaFine Clair - Nocturne. Next, i stamped Fairy Hugs - Thistleberries around her looking like she was on a path. I used Fairy Hugs - 2nd Anniversary - You Are Special (mountains) in the background. I added a masked moon halo and then i stamped Fairy Hugs - Woodland Flight.  Last thing is i colored the stamps  with Prismacolor pencils and Pentel's Sparkly Gold Gel pen and added some coloring for the path and base of the mountains. 
  
Fairy Stamper Store Supplies:

 Don't forget to include #fairystamperhugs on your projects and tag us at @FairyStamperHugs so we can be sure to see and comment on your projects!

Sign up to receive Fairy Stamper Newsletters at the Fairy Stamper store.

Monday, October 3, 2022

Fairy Hugs - 2nd Anniversary Special As You Are!

Happy Monday!

Let's see what we can make using supplies from Fairy Hugs Store 

Catching up on a few cards that didn't make it on my blog.

I am using Fairy Hugs - 2nd Anniversary - Special As You Are

For this card,  my inspiration was the die shape.  This die is really large and is made as a "tag", i decided to turn it into a card by off setting the top cutting line above the fold of the card base. Then i cut out another full size die and glued that to the folded card base (overhanging it just a bit at the top so that it lines up with the design of the card base). Next i die cut the "scene" part of the die. (layer that fits on top of the main die).  So i took this die cut piece (to use as my scene) and started by using Distress Oxide Ink - Squeezed Lemonade in the center gradually adding Distress Oxide Ink - Antique Linen and then Distress Oxide Ink - Shaded Lilac.   Next i started stamping.  I stamped Fairy Hugs - Stone Fortress Texture as shown with VersaFine Clair - Morning Mist. I stamped the tree from Fairy Hugs - 2nd Anniversary - Special as You Are to get a "focal" point in VersaFine Clair - Nocturne. I masked off the Stone Fortress and stamped the tree again in VersaFine Clair - Morning Mist.  Next i stamped the mountain peaks from the 2nd Anniversary set with VersaFine - Morning Mist.  Now to fill in the scene, i added Fairy Hugs - Mini Hares (one hare), Woodland Flight (2 birds) and stamped the foliage from the 2nd Anniversary set in front of the larges stone wall.. all in VersaFine Clair - Nocturne. Oh, i also stamped the sentiment from the 2nd Anniversary set.  Next, i used Prismacolor pencils and colored in the stone fortress and the peaks of the mountains.   I also colored in some ground by the tree and hare. Last i used a mask for the moon and used Distress Oxide Ink - Chipped Sapphire to make a halo. To finish off the scene, i inked around the edges with Distress Oxide Ink - Chipped Sapphire. 

Die used - Studio Light 379

Fairy Hugs Store Supplies:


Like us on Facebook
Follow us on Instagram: Fairy Hugs Store
 Join our Fairy Hugs Facebook Group here

 Don't forget to include #FairyHugsStore on your projects and tag us at @FairyHugstore so we can be sure to see and comment on your projects!

Sign up to receive Fairy Hugs Newsletters at the Fairy Hugs store.

 
Thanks for stopping by!