
I want to share with you some Tips and Tricks for using Your Next Stamp's Digital Stamps, as you noticed two weeks ago, Angel from the Digital Design team shared this digital stamp called Cuddles and did some paper piecing. This week i'd like to show you how to add a text box to your digital images.
I have used the program PhotoShop..there are many editing programs out there and some that are free. For this post i will tell you how i used my PhotoShop. (Look at the image below)
1. Open up your image
2. Select "T" for text, using your mouse make a box (don't worry where you make the box you will be able to move it where you want it later)
3. On the top toolbar select a font you'd like to use. I used Silom. Your font is probably black, you can change that by selecting the color box at the bottom left (in my picture it is red because i selected red) A color box will pop up and you can select another color. If you have already typed your word, you will have to highlight it and pick the color again. To make your word larger you can select the text size at on the top tool bar. Your size will depend on your image and your size preference and font you decided to use. If you make your font large and it's not fitting inside of your box, you can use the squares on the corners to make your box larger (or smaller).
4. Once you are happy with your text you can select the top arrow button on the side toolbar. It will make the "text box" border disappear. Now you can drag your word where ever you want on your image.
5. Take note.. DO NOT SAVE this image unless you have a copy of the original. What i like to do, is once i like what i have made i will "SAVE AS" and then i save it as a .jpg..some people like a png.
6. Let's say you messed up along the way, what i have found to do is i can select edit and it will let me take a step backwards. Or let's say you want to start over completely..just delete this and start again.
7. Once you are happy, you can "SAVE AS" like a said and print off your digi's like you normally do.
PS. There might be an easier way to accomplish this task, i am giving you the way i learned how to do it. :0)
For those of you wanting a youtube video, i found this one, it only shows how to add the text box not the font color: https://www.youtube.com/watch?v=F3i1MOngavs
Ok and i found this video with even more detail! https://www.youtube.com/watch?v=DIpX3HtjGSA
 Now for the fun...I took a look at this cute bunny and said, Cuddles, you would make an awesome Valentines, Save the Date or Easter card...i am thinking maybe you could figure out some more idea..if you do please share them by leaving a link in the comments here or entering our challenge this month (Link is here)! I'd be super excited to see what you come up with!!
Here are my samples using these ideas:
"Kiss Me" Cuddles also using the Your Next Stamp Fry Box Die found here.
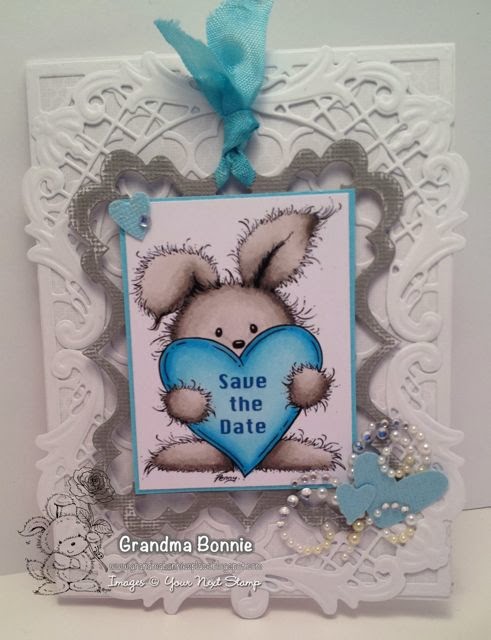
 "Save the Date" Cuddles also using the Your Next Stamp Photo frame found here.
*Take note*, i would actually add the date to the heart as well!
 "Happy Easter" Cuddles again using the Your Next Stamp Photo Frame found here.
 So glad you stopped by, have fun crafting!
Challenges:
Digi Galore- Monochrome-(Kiss Me bunny)
4 Crafty Chicks- Wedding (second card.. save the date (for wedding)

Cute Card Thursday- Warm It Up (Happy Easter card)
Inspired by- photo inspiration

I have used the program PhotoShop..there are many editing programs out there and some that are free. For this post i will tell you how i used my PhotoShop. (Look at the image below)
1. Open up your image
2. Select "T" for text, using your mouse make a box (don't worry where you make the box you will be able to move it where you want it later)
3. On the top toolbar select a font you'd like to use. I used Silom. Your font is probably black, you can change that by selecting the color box at the bottom left (in my picture it is red because i selected red) A color box will pop up and you can select another color. If you have already typed your word, you will have to highlight it and pick the color again. To make your word larger you can select the text size at on the top tool bar. Your size will depend on your image and your size preference and font you decided to use. If you make your font large and it's not fitting inside of your box, you can use the squares on the corners to make your box larger (or smaller).
4. Once you are happy with your text you can select the top arrow button on the side toolbar. It will make the "text box" border disappear. Now you can drag your word where ever you want on your image.
5. Take note.. DO NOT SAVE this image unless you have a copy of the original. What i like to do, is once i like what i have made i will "SAVE AS" and then i save it as a .jpg..some people like a png.
6. Let's say you messed up along the way, what i have found to do is i can select edit and it will let me take a step backwards. Or let's say you want to start over completely..just delete this and start again.
7. Once you are happy, you can "SAVE AS" like a said and print off your digi's like you normally do.
PS. There might be an easier way to accomplish this task, i am giving you the way i learned how to do it. :0)
For those of you wanting a youtube video, i found this one, it only shows how to add the text box not the font color: https://www.youtube.com/watch?v=F3i1MOngavs
Ok and i found this video with even more detail! https://www.youtube.com/watch?v=DIpX3HtjGSA
Here are my samples using these ideas:
"Kiss Me" Cuddles also using the Your Next Stamp Fry Box Die found here.
*Take note*, i would actually add the date to the heart as well!
Challenges:
Digi Galore- Monochrome-(Kiss Me bunny)
4 Crafty Chicks- Wedding (second card.. save the date (for wedding)
Cute Card Thursday- Warm It Up (Happy Easter card)
Inspired by- photo inspiration
These are all so cute! Love your coloring! Thanks for playing at Inspired By.
ReplyDeleteThese are adorable! Great idea for a Save The Date card! Thanks for playing at 4 Crafty Chicks. Hope to see you again next week!
ReplyDeleteTina
These cards are so very sweet! Love the variety of sentiments and designs you've made! The little heart pocket and the sweet layered frames and the polka dotted grass with the honeycomb embossing ....you just always have so many wonderful details!
ReplyDeleteOh my goodness! I love this image, my mom has it. I love how you made so many different cards. It is just too cute and your wedding card is one you can ooo and ah over. Great details, layout and coloring. Thank you so much for sharing your inspiration with us at 4 Crafty Chicks.
ReplyDeleteGreat tute, Bonnie!!! Very clear and useful instructions!! :) :)
ReplyDeleteAwesome cards, too!! :) :)
Great tutorial and darling cards using your technique! :^)
ReplyDeleteHugs, Penny
Fabulous tutorial. LOVE all of the cards, they are super cute.
ReplyDeleteThanks for joining us at Digi Galore.
Cindye DT