Lavinia Stamps had a new release this month!
I have seen the new dragon called, Mideela (small) used on a sample card
making the images mirror each other and make a heart.
My friend was curious as to how to create this look.
If you remember, earlier this summer i made a Lavinia shaker card.
I stamped a tiny stamp called, Forager Fairy inside of the shaker acrylic.
What i didn't realize, is that it gave me a mirrored stamped image.
So when i tried to find the original card showing the dragons making a heart.
I couldn't find the original source, but i looked close and decided it
might be the acrylic she stamped on.
So....i gave it a try.
Except, there is a few things i learned along the way.
How i made this stamped image:
I stamped with Stazon Pigment - Piano Black onto a recycled acrylic packaging.
*** If you make a mistake, you can "erase" it with rubbing alcohol.
Other inks seem to slide and i didn't get a good image.
I ended up using a charity frame i had that was circular.
I could have stamped on the glass frame, but decided,
the images would be protected better being under the glass.
So first thing is to cut the acrylic to the size you need for your frame.
Place this acrylic on a piece of white paper.. it lets you see what you are doing better.
Then another tip, get that plastic your stamp comes on.
The one with the stamped image.
You can use that under the acrylic. I suggest putting that stamped example that came with your stamp, under the left side the acrylic.
I eyed it, but you might want to draw a pencil line to find the center on the white paper under the acrylic.
Now you can put the stamp on the acrylic block and put it on the acrylic with out the ink so that you can do some tweaking before you stamp.
Then once i was satisfied with the positioning, i taped down the prestamped dragon under the acrylic. Then i taped the acrylic down too.
Now you can ink and stamp.
If you aren't happy, you can "erase" with rubbing alcohol.
Once you get the right side stamped, and it is dried, you can flip the acrylic over.
I lined up the stamped image to the stamped example...and then i stamped again.
Sounds like a lot, but once you do it one time, you will remember how to do it the next time.
I used my Zig black pen/marker to touch up any imperfections that weren't a big deal.
I have used the following Lavinia Stamps:
Mideela (small dragon)
Dragon Stone Castle (my favorite)
Sentiment - Embrace Your Dreams
Supplies used: (many items i purchased at
7 Kids Craft Store)
Charity Frame
Acrylic recycled from packaging
Black Gesso
Art Alchemy Wax
Scrap FX - Moon Chipboard
MitForm Castings - Steampunk Gear
Stazon Pigment Ink - Piano Black (for acrylic)
Versa Clair - Morning Mist (for paper background)
Nuvo Drops - Dirty Bronze
We Are 3 Digital Paper - Fairy Background - available
here.
A step by step in photos:
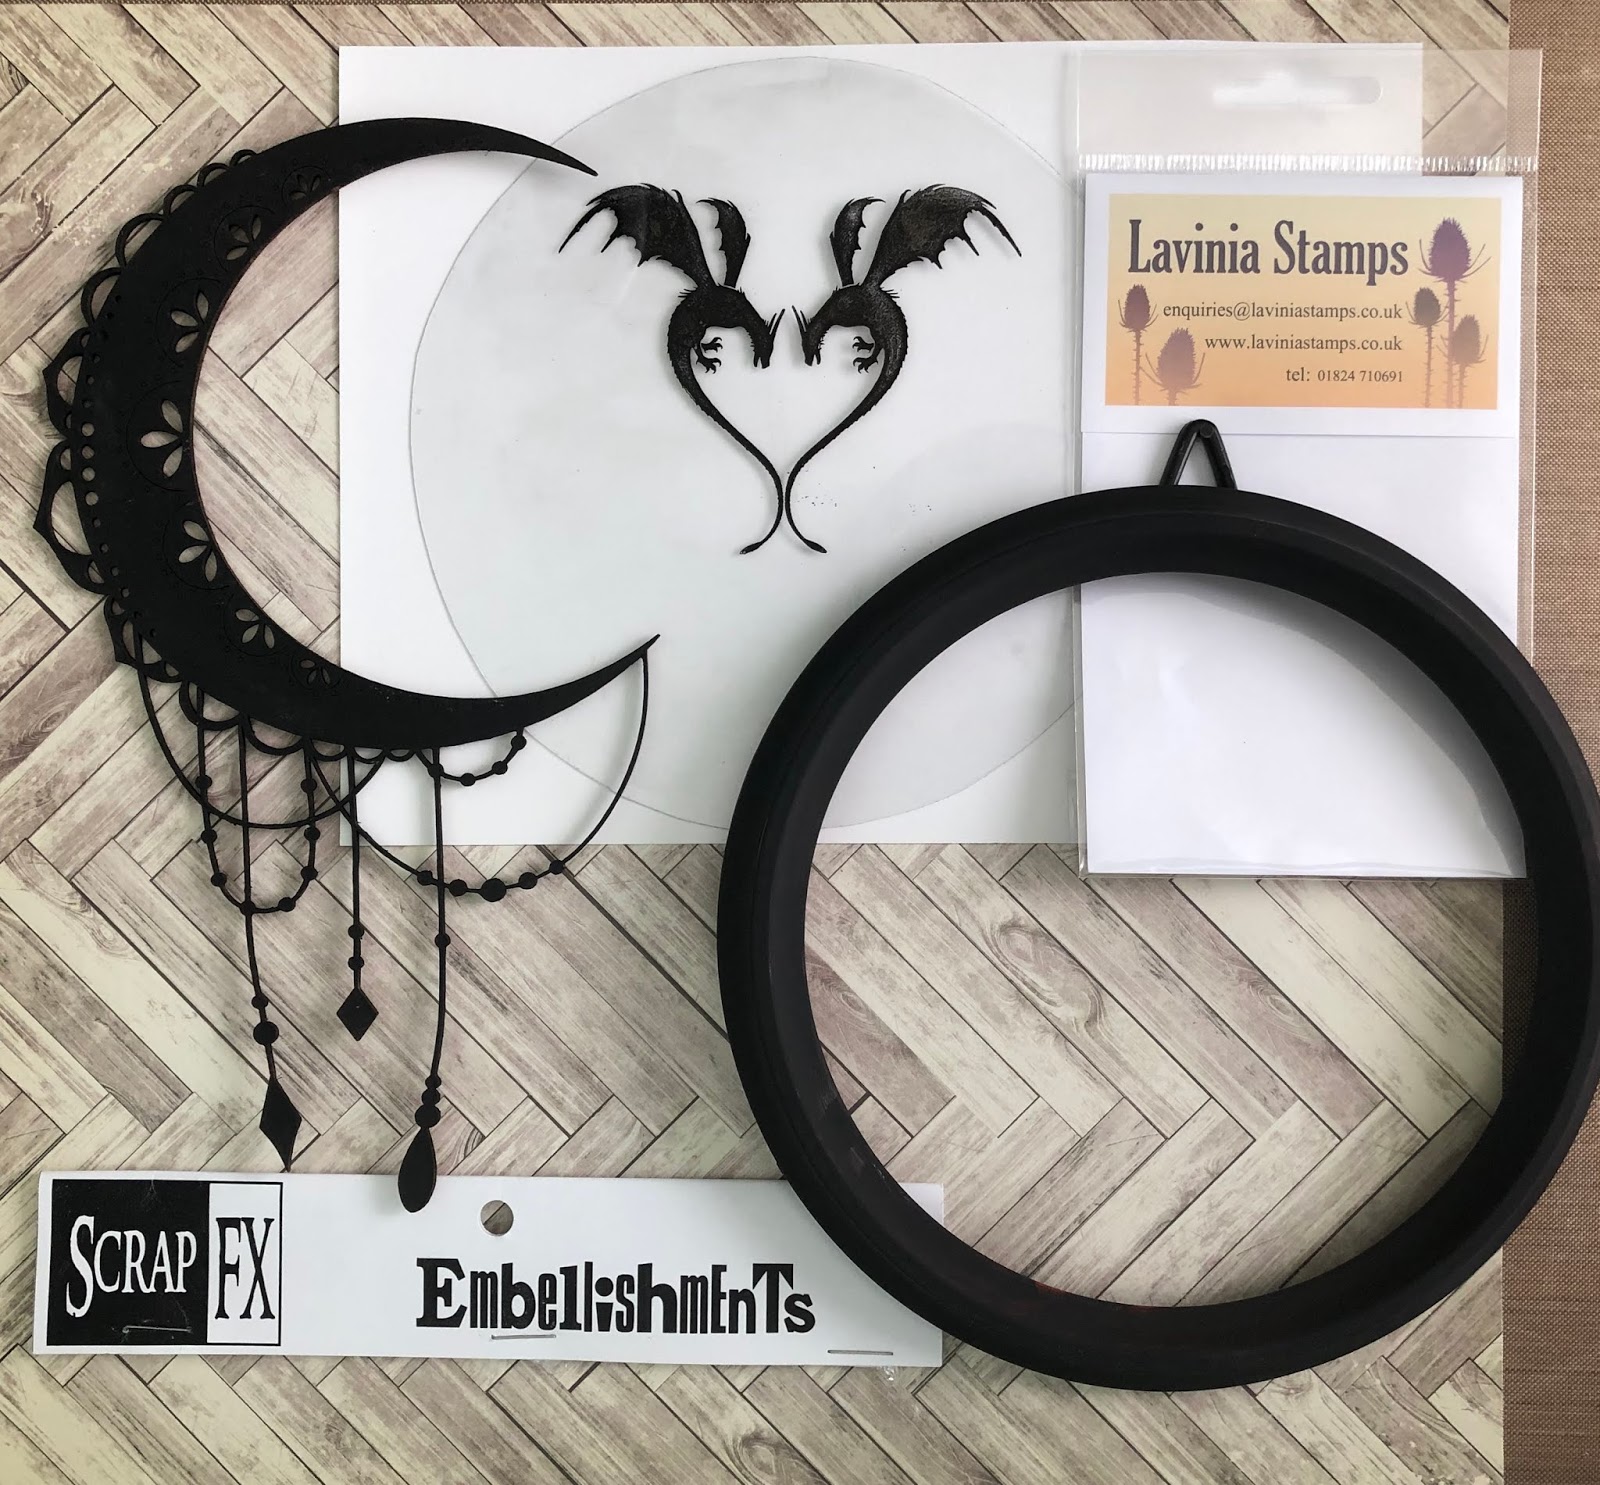
Charity Frame and Recycled acrylic
Stamped dragons on acrylic, Black Gesso on frame and chipboard.
Chipboard was gray.
Putting waxes on frame and chipboard.
Printed off digital paper and stamped images with Versa Clair - Morning Mist.
Inked around the edges and added some black "clouds/mountains".
I would love for you to visit We Are 3 Digital Shop Facebook group and share your cards/projects created with We Are 3
Digital Shop paper/images and sentiments.
Visit us by clicking
here!
Click
here for the We Are 3 Etsy Store link
Challenges:

 YouTube Video Link: https://youtu.be/ocGtZtNkeFQ