Thursday, December 30, 2021

Fairy Hugs - Moose Set - A Birthday Wish for You!

 Hello everyone and Happy Thursday!! 

I am a DT for Fairy Stamper Hugs!
It is the #1 USA Retailer for Fairy Hugs Stamps
Check out the store here!!
 

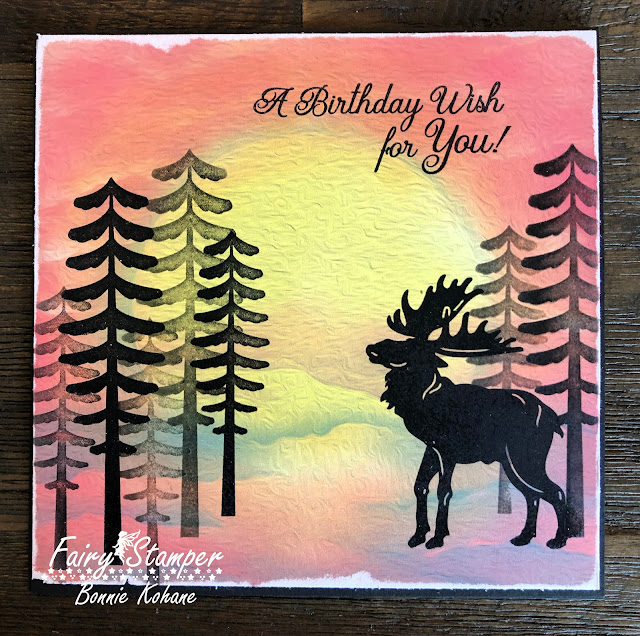
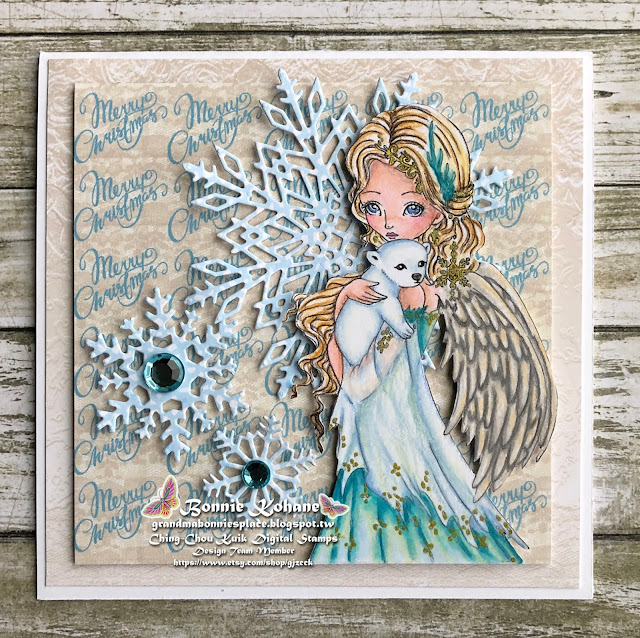
I started out with an Ink Blended background. 
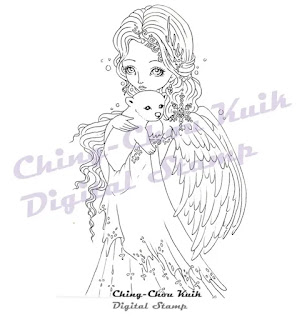
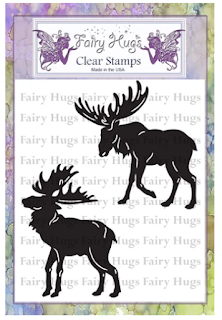
Next i simply stamped the images using VersaFine Clair Ink - Nocturne
The lighter images were done as a second generation stamping.
I decided to have a distressed edge and used my hand sanding block to achieve that.
   
Fairy Stamper Store Supplies:


Like us on Facebook
Follow us on Instagram: Fairy Stamper Hugs
Join our NEW Fairy Stamper Hugs Facebook Group here

 Don't forget to include #fairystamperhugs on your projects and tag us at @FairyStamperHugs so we can be sure to see and comment on your projects!

Sign up to receive Fairy Stamper Newsletters at the Fairy Stamper store.

Sunday, December 26, 2021

Snow scene with Tutti Designs - 718 Swirly Deer

Hello!  Let's see what you can create with Tutti Designs today!


This was a fun card and fairly quick to create.  Let's start with the potted tree. I die cut this tree from white card stock.  I used VersaMark Embossing ink on the aqua part of the tree.  I then put Distress Embossing Glaze - Salvaged Patina on the inked part and heat embossed it to get this "ceramic type glaze".  Next i put some score tape the size of the pot on a scrap piece of white card stock. Then i die cut it so that the tape will be facing up so i can add glitter to the pot. I fussy cut the top of the pot and then pulled of the tape and put some Fairy Hugs glitter- Cerulean on it.  Next i glued the glitter pot to the die that i added the glaze to.
Next, i cut out the Swirly deer (deer only) and the snowflakes.
Now i am ready to put the card together.  I decided on a gray/dark gray buffalo plaid paper from We Are 3 Digital Paper - Plaids, Stripes Neutral for the background.  I matted the plaid in a gold metallic paper.
I wanted to anchor the scene so i used some white seam ribbon around the matted plaid paper and adhered that to the card base.  I glued the deer down and added the tree and snowflakes with foam tape.  I added gems to the tree and to the snowflakes.  And for some fun, (even though you can see the color well) i added a red gem to the deer's nose. 

I have used:


Be sure to visit Tutti Designs
for LOTS more fabulous dies and
come back again for more Tutti Designs inspiration!

Here are some Tutti Designs quick links:


Saturday, December 25, 2021

Wishing for a White Christmas? Tutti Designs - 690 Window Cat keeps wishing!

Hello!  Let's see what you can create with Tutti Designs today!

This Window Cat is wishing for a White Christmas!

This card was really tricky to create.  I wanted a scene for the cat to look at.  
So i did some snipping..and it isn't my favorite thing to do to a die. 
If i had to do it again i would not cut the die, i would make a pattern to cut the paper that i put behind instead of cutting the die.
So i used 3 different papers the scene paper is from We Are 3 Digital Paper - Sky Scenes.
The paper behind the window curtain is We Are 3 Digital Paper - Dreamy Creamy.
The entire die is cut from We Are 3 Digital Paper - Winter Plaid.  I wanted a "Christmas" kitty and so i used the green plaid.  The kitty's collar is 3 gems, i choose as "Christmas colors".

I have used:

Be sure to visit Tutti Designs
for LOTS more fabulous dies and
come back again for more Tutti Designs inspiration!

Here are some Tutti Designs quick links:

We Are 3 Digital Paper - Winter Plaid (small green plaid used for die)


We Are 3 Digital Paper - Sky Scenes (scene that cat is looking at)

Friday, December 24, 2021

Warm and Cozy with Tutti Designs - 705 Snowflake Village

Hello!  Let's see what you can create with Tutti Designs today!

Here is the second card i made with the Snowflake Village!

There is something about a buffalo print that feels warm and cozy! 
This is an easy card to create! First thing i did was work on the moon background paper. I used a textured paper from We Are 3 Digital Paper - Dreamy Creamy (net). Next i cut out a cardstock circle for a "mask" to create the moon.  I placed the mask in the center of the paper and using my blending brush i added some Distress Oxide Ink - Frayed Burlap.  If you want the faint clouds in the moon, you will need to tear some paper and lightly add the same ink to the center of the moon. Next, if you are following my posts you will notice i said i cut this die out using - We Are 3 Digital Paper - Winter Plaid and saved the negative hearts, circles and rectangles for a previously posted card.  Today, i am sharing the die i used.  All you need to do is glue the plaid die to the moon paper that was created.  Now add that to another mat and place it on a card base.  I finished it off by adding clear gems to the center of the snowflakes.

I have used:

Be sure to visit Tutti Designs
for LOTS more fabulous dies and
come back again for more Tutti Designs inspiration!

Here are some Tutti Designs quick links:


Thursday, December 23, 2021

Fairy Hugs - Fairy Library...a great place to visit!

 Hello everyone and Happy Thursday!! 

I am a DT for Fairy Stamper Hugs!
It is the #1 USA Retailer for Fairy Hugs Stamps
Check out the store here!!
 
This is one of my favorite cards from the book release that i haven't posted on my blog yet.

This background paper was created on a Gel Plate.  My intention was to use it for Halloween..and it just worked out to use it for the Book release!
First thing i did was stamp Fairy Hugs - Fairy Dictionary in the back ground.  Then i auditioned my stamps to see how they would all fit on. I stamped them once i was happy with the arrangement with VersaFine Clair - Nocturne.  Next i anchored the Library by adding some Distress Oxide with torn paper as my mask.  Last, i colored in the stamps with Prismacolor pencils. This was a joy to create..i loved it!

Fairy Stamper Store Supplies:


Like us on Facebook
Follow us on Instagram: Fairy Stamper Hugs
Join our NEW Fairy Stamper Hugs Facebook Group here

 Don't forget to include #fairystamperhugs on your projects and tag us at @FairyStamperHugs so we can be sure to see and comment on your projects!

Sign up to receive Fairy Stamper Newsletters at the Fairy Stamper store.

Wednesday, December 22, 2021

Ching Chou Kuik - Polar Snow bids you a good bye!

Ching Chou Kuik's December Facebook Challenge is almost over!
The theme this month is  “TIS THE SEASON, CHRISTMAS or WINTER”

You can find the Facebook challenge 
by visiting the Ching Chou Kuik Facebook group here.

** Little note.... this will be my last card for Ching Chou Kuik Design Team
I started on the DT in the fall of 2017, the time flew by.
Ching Chou Kuik images are one of my favorite images i've colored and i will miss being on her team!

Here is my card using Ching Chou Kuik image, 
Polar Snow

I have used  Copics and Prismacolor Pencils to color this image.
Dies used:
Sizzix/Tim Holtz - Large Snowflake


You can see all of Ching Chou Kuik's beautiful images at her Etsy Store called, Gjzcck.
Click here to visit her store!

I am also using:


Thank you for stopping by today!

Tuesday, December 21, 2021

Time for Gingerbread Houses!! Tutti Designs - 705 Snowflake Village

Hello!  Let's see what you can create with Tutti Designs today!

This reminds me of Gingerbread Houses or a village of chalets

This was so fun to create..and i ended up with two cards!!
First i die cut the snowflake village from We Are 3 Digital Paper - Fairy Delight (wood grain paper) because i wanted a white core paper so i could sand the die to make it look "rustic".
Next i die cut the snowflake village again from We Are 3 Digital Paper - Winter Plaid because i could reduce the size of the buffalo print to fit the size i wanted.  I saved the buffalo print paper for another card, but i saved the hearts, circles and rectangles for this card.  The background paper (blue) is also from We Are 3 Digital Paper - Textured Scenes.  I carefully sanded the snowflake village and glued that to the blue background. Next i layered the snowflake village on top of the buffalo print back ground. I embellished the village with the negative cut outs from the buffalo die cut and i added some tiny white pearls to tree.  Next i used a scrap of green buffalo print to cut out the green you see on the card.  I didn't cut the whole die out..just those sections so i could add those to the scene too.  I added some clear gems to the centers of the snowflakes. 
I will be sharing the buffalo card in another blog post. 

I have used:

Be sure to visit Tutti Designs
for LOTS more fabulous dies and
come back again for more Tutti Designs inspiration!

Here are some Tutti Designs quick links:

Having the right paper at your fingertips is always nice.. that's why i like digital paper!


Monday, December 20, 2021

Fairy Hugs - Dogwood Blossom YouTube Tutorial

Hello everyone and happy Monday!! 
It’s time for a new Fairy Stamper YouTube featuring Fairy Hugs stamps.
      
Every week you will see 
Fairy Stamper YouTube Tutorial Videos by the Fairy Stamper Design Team

Please subscribe so you won't miss a video!

In this video i will share how i created this card.  
Here is the YouTube Video Link:


Fairy Stamper Products Used 


Other supplies:
Distress Embossing Glaze - Salvaged Patina
Ranger Embossing Glitter - Turquoise
Nuvo Fine Embossing Powder - Classic Gold 
Prismacolor Pencils 

 Store ** Facebook Challenge ** Facebook** Instagram ** YouTube

Like us on Facebook
Follow us on Instagram: Fairy Stamper