Pages

Tuesday, May 24, 2022

NEW Release Sneak Peek - Fairy Hugs - Dancing Bunnies

 Hello everyone and Happy Tuesday! 

Guess what?  Fairy Hugs is releasing a NEW set of stamps on May 29th!

Let's see what we can make using Fairy Hugs Store supplies! 

I am using Fairy Hugs - Dancing Bunnies!

Do you spy something new?  On this card, i have used 3 new stamps and 1 new stencil!  I started out with Fairy Hugs Craft Papers - BumbleTwinkle.  I added a moon to the background and one new stencil called, Fairy Hugs Stencil - Fairy Buds.  Next i stamped two Fairy Hugs - Clef Trees. and then i added Fairy Hugs - Musical Strings for the Fairy Hugs - Dancing Bunnies to walk on. Super simple card to create! I did add some color to the Clef Trees. 

Fairy Hugs Store Supplies: (available May 29th)
Fairy Hugs - Dancing Bunnies

Fairy Hugs - Clef Tree

Fairy Hugs - Musical Strings

Fairy Hugs Stencil - Fairy Buds


Like us on Facebook
Follow us on Instagram: Fairy Hugs Store
 Join our Fairy Hugs Facebook Group here

 Don't forget to include #FairyHugsStore on your projects and tag us at @FairyHugstore so we can be sure to see and comment on your projects!

Sign up to receive Fairy Hugs Newsletters at the Fairy Hugs store.

 
Thanks for stopping by!

Monday, May 23, 2022

Fairy Hugs Craft Papers - Moon Scene Tutorial

Hello everyone and happy Monday!! 
It’s time for a new Fairy Stamper YouTube featuring Fairy Hugs stamps.
      
Every week you will see 
Fairy Stamper YouTube Tutorial Videos by the Fairy Stamper Design Team

Please subscribe so you won't miss a video!

In this video, i show how you can transform Fairy Hugs Craft Papers 
into a Moon Scene paper for your stamping.

Fairy Stamper Products Used 


 Store ** Facebook Challenge ** Facebook** Instagram ** YouTube

Like us on Facebook
Follow us on Instagram: Fairy Stamper

Saturday, May 21, 2022

Kerst Christmas Facebook Challenge and Sheepski Designs - Christmas Stocking

I love seeing Christmas cards every day, do you?

Kerst Christmas Facebook Group has a challenge monthly.
You can share ANY Christmas cards and have a chance to win prizes, too!

Kerst Christmas Facebook Sponsor this month:

Here is my DT card using Sheepski Designs - Christmas Stocking


Please visit us at Kerst Christmas Facebook Group here

I am the owner of We Are 3 Digital Shop 
and would love to invite you to We Are 3 Digital Shop Facebook Group!

Challenges:

Friday, May 20, 2022

Tutti Designs - 746 Honey Bee Hexagon

Hello!  Let's see what you can create with Tutti Designs today!


For this card, I used two Fairy Hugs Papers for the layers behind the Tutti Designs - 746 Honey Bee Hexagon.  I used We Are 3 Digital Paper - Howdy Autumn (gold denim) paper to cut out the hexagon.  I saved the negative pieces to set back into the die. Before i did the insetting, i put some Distress Oxide on the hexagon and quickly added some Ranger Embossing Tinsel - Copper to the top and heat set it. then i adhered the hexagon to the top layer. Because i used Distress Oxide and it dries quickly you can see not all of the embossing powdered adhered..and that was fine as i really wanted the two tone look. The original color of the die cut was the inset color of the foliage. 
I put some Distress Oxide Ink - Dusty Concord on some white cardstock that had some double sided tape on the background large enough so i could cut out the large petal flowers. I did the same thing with the smaller petals by using Distress Oxide Ink - Chipped Sapphire.  I used some of the hexagon shapes for embellishments. Next i put some Distress Oxide Ink - Dusty Concord on another piece of white card stock and cut out the bee. I added more ink to the bee to darken the edges by using Distress Oxide Ink - Chipped Sapphire. I used my sparkly gold gel pen to add some design to the bee.  Last thing i did was add some sparkly gems to the flowers and hexagons.

I have used:


Be sure to visit Tutti Designs
for LOTS more fabulous dies and
come back again for more Tutti Designs inspiration!

Here are some Tutti Designs quick links:

Thursday, May 19, 2022

Fairy Hugs - Nigel is serving tea!

 Hello everyone and Happy Thursday!! 

I am a DT for Fairy Stamper Hugs!
It is the #1 USA Retailer for Fairy Hugs Stamps
Check out the store here!!
 

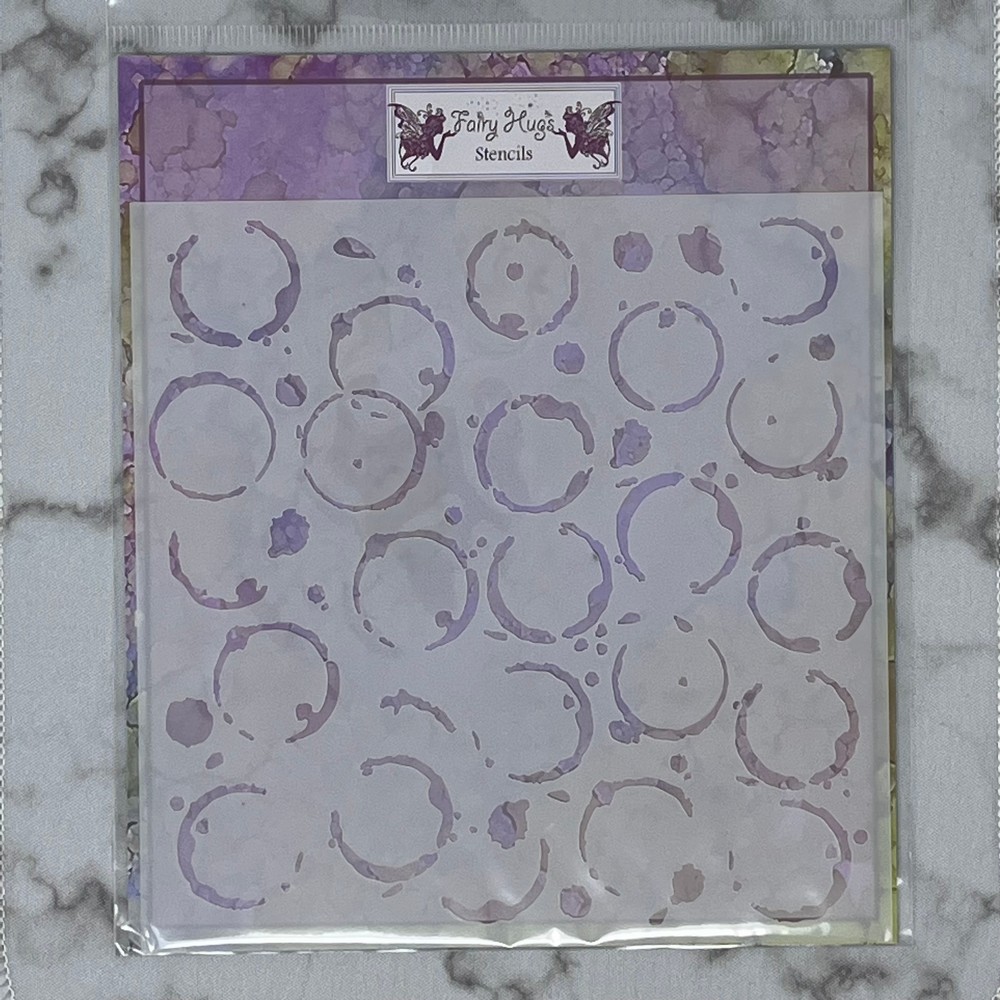
For this card, i created yet another tea bag shaped card.  I just cut the top corners at a diagonal. Next I cut a piece just a bit smaller.  Next thing i did was stamp the images, Fairy Hugs - Nigel, Fairy Hugs - Stacked Teacups and Fairy Hugs - Gingko Leaves on to Fairy Hugs NEW paper - Thunderglow. I then colored in the images with Prismacolor Pencils and a Gold sparkly gel pen. Before i adhere this to the the card base, i decided to add a stencil.  I am using the NEW Fairy Hugs Stencil - Water Stains. I used molding paste and Distress Oxide Embossing Glaze - Salty Ocean by putting the glaze on top of the molding paste while it was wet.  I waited for it to semi-dry and then i heat set it to get the glaze look.
I can now adhere this to the card base.  Last thing i did was make the tiny tea bag.  I used a coffee filter and stamped it with Fairy Hugs Sentiment - Tea Word Collage. I folded it up like a tea bag and hole punched the top of the bag to tie a string on. I hand cut the small piece at the top of the card to help with the tea bag card shape and stapled the end of the tea bag string to it.  I used double sided foam tape and adhered that to the top of the card.  For a little sparkle, i used some Acrylic Glitter Hologram paint..and painted the top of the stamped tea bag and parts of the inside of the stencil water stains. 
 
Fairy Stamper Store Supplies:


Like us on Facebook
Follow us on Instagram: Fairy Stamper Hugs
Join our NEW Fairy Stamper Hugs Facebook Group here

 Don't forget to include #fairystamperhugs on your projects and tag us at @FairyStamperHugs so we can be sure to see and comment on your projects!

Sign up to receive Fairy Stamper Newsletters at the Fairy Stamper store.

Monday, May 16, 2022

It's a Tutti Designs - 732 Hedgehog kind of day!

Hello!  Let's see what you can create with Tutti Designs today!


For this card, let's start with the stenciled background.  I used a Fairy Hugs Stencil - Flower Vines and Distress Oxide - Twisted Citron. Next layers are 2 Tutti Designs - 213 Nesting Stitched Tags. The smaller one i inked with Distress Oxide - Picked Raspberry. I turned the tags upside down and adhered them with double sided foam tape.
Next layers are Tutti Designs - 738 Spring Trunks.. and it is just cut out of white card stock.  I inked up some paper with Distress Oxide - Twisted Citron and stamped the Fairy Hugs Sentiment - Fairy Whispers. I hand cut the sentiment strip and aded that to the layers with double sided foam tape. Now for the fun part.. i cut out Tutti Designs - 732 Hedgehog out of white cardstock. I inked up the "rose" parts with Distress Oxide - Picked Raspberry and used Distress Embossing Glaze - Picked Raspberry to make it a bit shiny. Now, i added a bit more ink to the face, very lightly and a bit more on the nose and i did add more embossing glaze to the nose only. I inked up the bottom of the hedgehog with Distress Oxide - Twisted Citron, until it slightly overlapped the Picked Raspberry. Las thing i did to the hedgehog was add 3 white freckles with a white gel pen. I adhered the hedgehog with double sided foam tape.. very skinny tape in the roses area. I had a few tiny hearts in my stash and added those to the card as well.

I have used:
Be sure to visit Tutti Designs
for LOTS more fabulous dies and
come back again for more Tutti Designs inspiration!

Here are some Tutti Designs quick links:

Also used:

Fairy Hugs Bunny Tea Party! Fairy Hugs - Lost in Time

  Hello everyone and Happy Monday! 


Let's see what we can make using Fairy Hugs Store supplies! 

I am using Fairy Hugs - Lost in Time!

For this card, i created an inked scene to match the Fairy Hugs Craft Papers - Thunderglow. Next i stamped, Fairy Hugs - Lost in Time, Fairy Hugs - Mini Hares and Fairy Hugs - Tea Icons on to the paper i just inked up. I colored in the mug and the grass around the pocket watch and i used a gold glitter pen to highlight the pocket watch. 
I also used the Fairy Hugs - Stencil, Galaxy for the stars around the inked moon by using molding paste and sprinkled with glitter mixed with clear embossing powder. I heat embossed the stars. Next i stamped Fairy Hugs Sentiment - Tea Word Collage twice onto a coffee filter and cut a strip of the words. It almost looks like washi tape. I adhered the stamped scene to the card base. I decided to use some of my dies for this card.  I used a Tim Holtz 3D embossing folder that cuts out the lace. I also used Tutti Designs - 395 Vine for more embellishing. 

Fairy Hugs Store Supplies:


Like us on Facebook
Follow us on Instagram: Fairy Hugs Store
 Join our Fairy Hugs Facebook Group here

 Don't forget to include #FairyHugsStore on your projects and tag us at @FairyHugstore so we can be sure to see and comment on your projects!

Sign up to receive Fairy Hugs Newsletters at the Fairy Hugs store.

 
Thanks for stopping by!