Happy Friday!
Save the Date! Fairy Hugs will be on Create and Craft TV
Sept 1 - 3pm and 7pm UK time
Let's see what we can make using supplies from Fairy Hugs Store
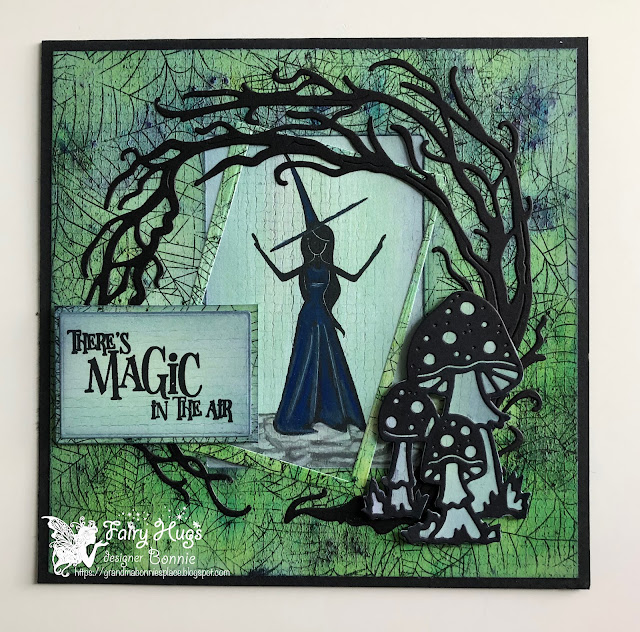
I am using Fairy Hugs - Abbie
First i stamped randomly over the entire paper using Fairy Hugs - Web Background. Next, i diecut and rectangle out of the center of the stamped webbed paper. Then i cut another rectangle "wonky frame" from the rectangle i cut out. But wait i also saved the rest to use to mat the sentiment too!
Next i used another paper but from Fairy Hugs Craft Paper - WinkleBush and stamped Fairy Hugs Abbie and Fairy Hugs - Stone Stage on a rectangle large enough to go behind the rectangle opening from the webbed paper. (**save a large enough scrap to back the toadstools you will be diecutting later and for stamping the sentiment on) I colored in the stone stage and Abbie and adhered that to the back of the webbed paper. Then i put the "wonky frame" on top of that. Now i die cut Fairy Hugs - Magical Hollow and NighGlow Toadstools from black card stock. i glued the Magical Hollow around the framed witch. So now i glued the toadstools to the scrap paper left over from stamping Abbie. Then i hand cut it out and used double sided foam tape to add that in place as shown above. So hopefully you have another scrap leftover from stamping Abbie that you can stamp the sentiment. I also used the rectangle"scrap" left from the webbed rectangle to mat the sentiment.
Fairy Hugs Store Supplies:
Don't forget to include #FairyHugsStore on your projects and tag us at @FairyHugstore so we can be sure to see and comment on your projects!


No comments:
Post a Comment
I love receiving comments...it makes me so very happy!